Working with Cyclus in on your machine
For this tutorial, Cyclus has been installed on your local machine so it can be run from either the IPython notebook or in the command prompt:

Command Line Execution
Running Cyclus from the command line requires running the command
$ cyclus
You can view all of the input flags for this command by running
$ cyclus -h
Some of the common input flags include:
-i argto identify the input file name-o argto specify the name of the output file to write to (default iscyclus.sqlite)-v argto specify log verbosity fromm 0 (quiet, default) to 11 (verbose)
Brief Introduction to Jupyter Notebook
A user can input the code required to run the simulation and analyze its output in one Jupyter Notebook with clear descriptions.
A tutorial on how to get Jupyter Notebook set up on your computer is available here
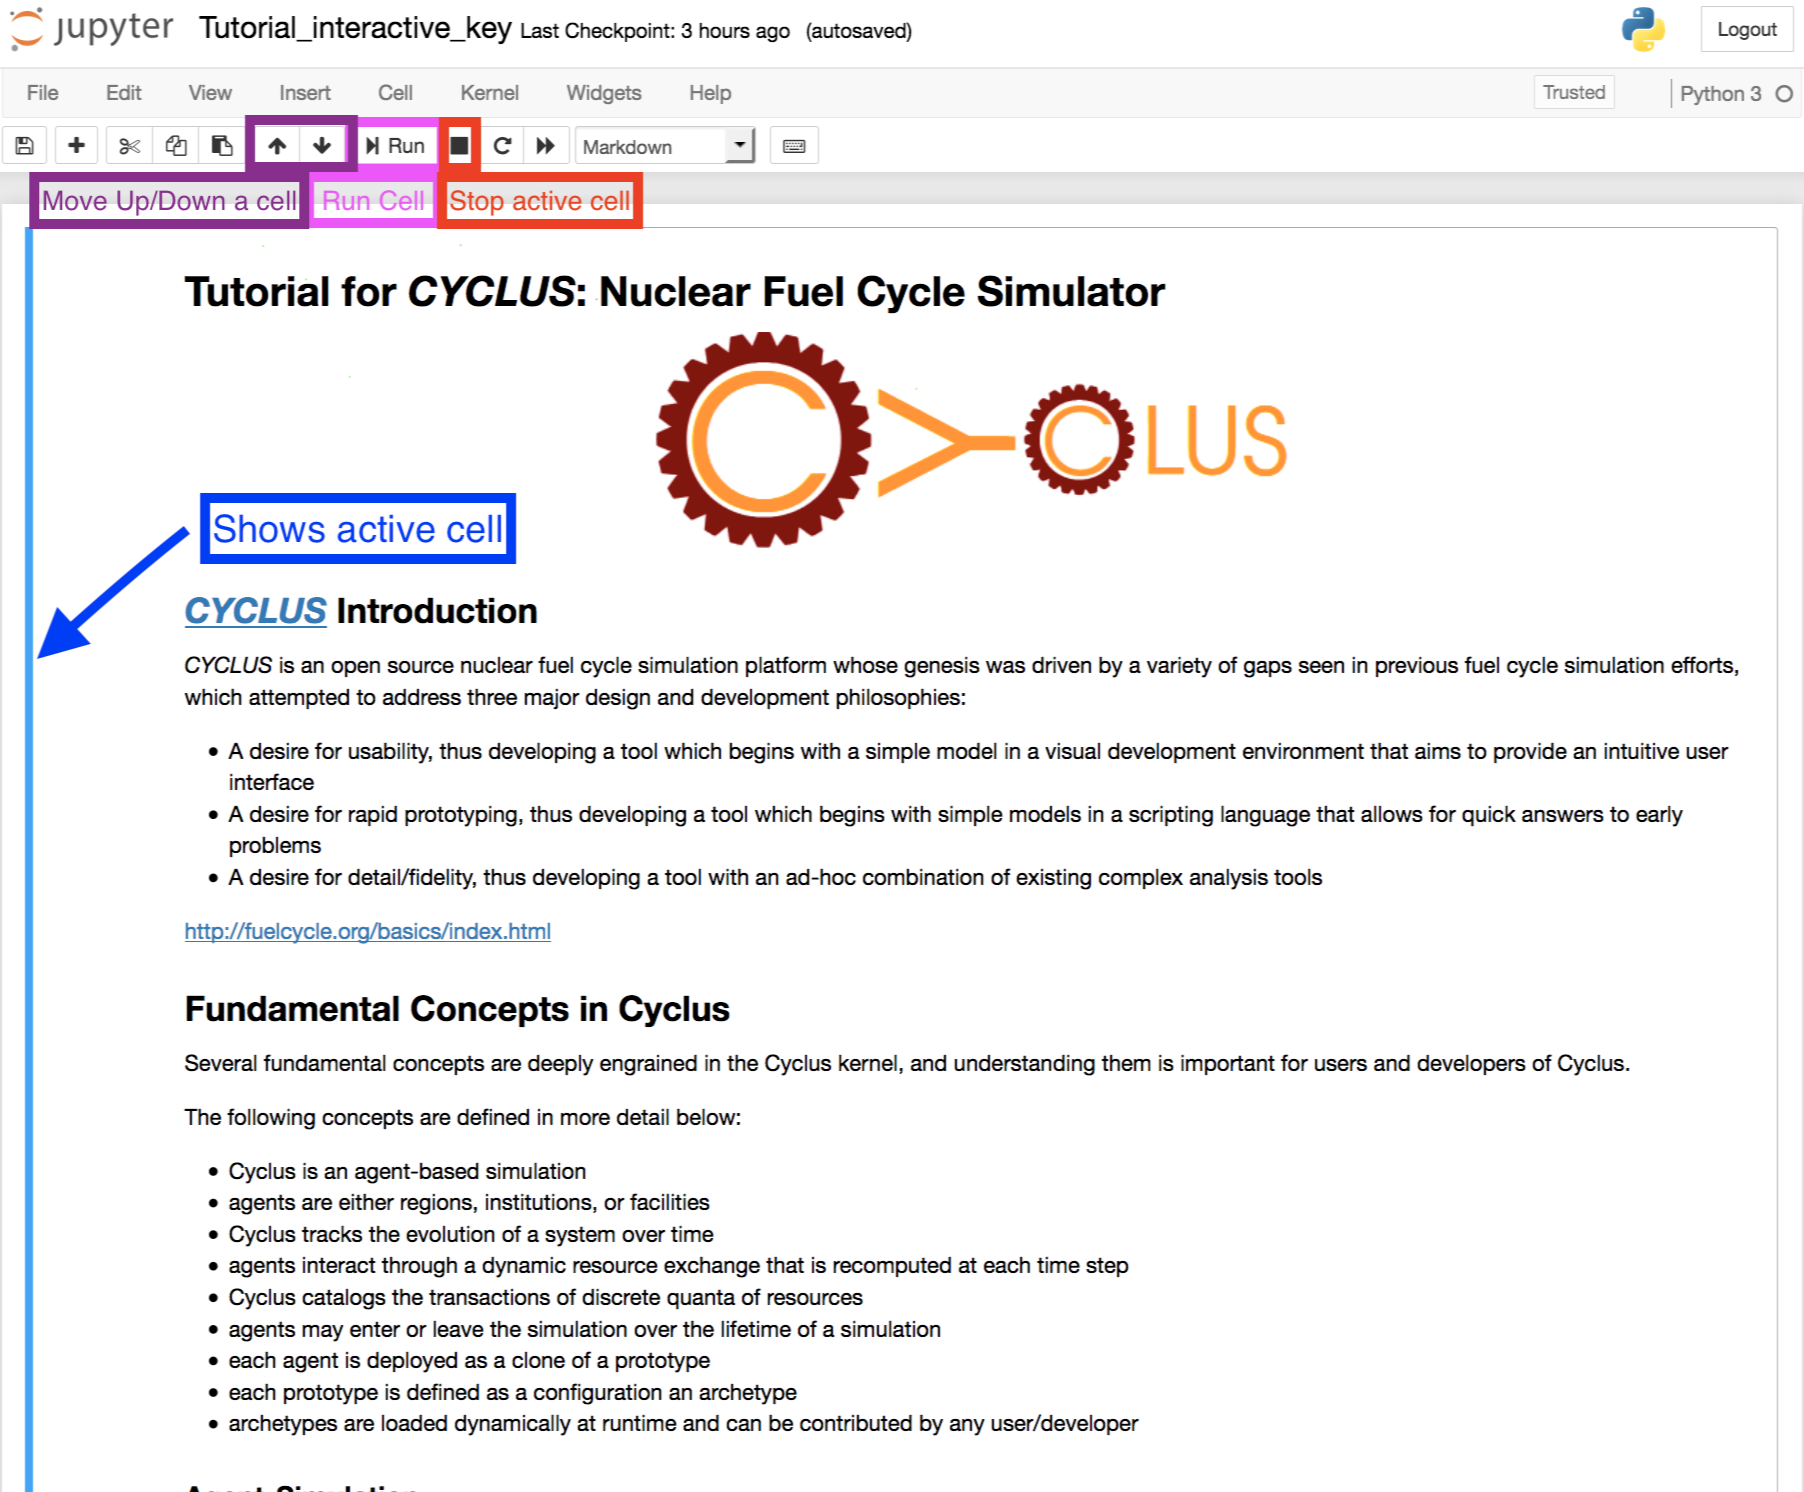
A Jupyter notebook has four main areas:
A Run button that runs the cell you’re in
A Up and Down buttons that move you up or down a cell
A vertical blue line that shows what cell you’re currently in
A Stop button that stops running the cell you’re in
Jupyter Notebook Scenario Execution
Go to the Jupyter notebook, making sure you are in the same folder as the input file
Remove any old Cyclus output files by:
!rm tutorial.sqliteRun Cyclus by:
!cyclus tutorial_oncethrough.xml -o tutorial_output_oncethrough.sqlite
When your simulation has finished, a file of the name tutorial_output_oncethrough.sqlite
will be in your file folder. Your Jupyter Notebook can then be used with
Cymetric to analyze your
data. Examples of how to use Cymetric can be found in the GitHub.
Backup: Files for Success
If your run did not succeed, you can retrieve correct input and output files here under input_oncethrough.xml
or ouput_oncethrough.sqlite. This link contains input and
output files for each of the examples in this tutorial.