Logistics
- When: Sunday 1-5pm
- Where: Global 2026, Chicago
- How: Please bring a laptop or tablet 1.
- What: Start Here
- Who: Your Instructors
Helpful Links
- Workshop-Codespace Repository
- VS Code Tricks Reference
- Self-Guided User Tutorial
- Collaborative Notes
How to Ask for Help
You will have one green and one red sticky note. Sometimes when you have completed an exercise, we’ll ask you to put the green sticky note on your laptop. If you run into a problem and need help, put up the red note. These can be held up for voting, but their real use is as status flags. With these, the instructor can quickly see from the front of the room what state the class is in and the helpers will know who can use some assistance.
First Steps
[Step 1] Make GitHub Account
This tutorial relies on GitHub Codespaces to distribute Cyclus. As such, you
will need a GitHub account to participate. If you already have an account on
GitHub, feel free to skip this step. If not, follow these instructions to make
one. You do not need git installed locally for this tutorial.
- Visit GitHub
- Click
Sign Upin the top right corner - Make an account using any of the options presented
[Step 2] Set up your GitHub Codespace
Once you have a GitHub account, and are signed in on GitHub, visit the Tutorial Repository. From here, you will need to:
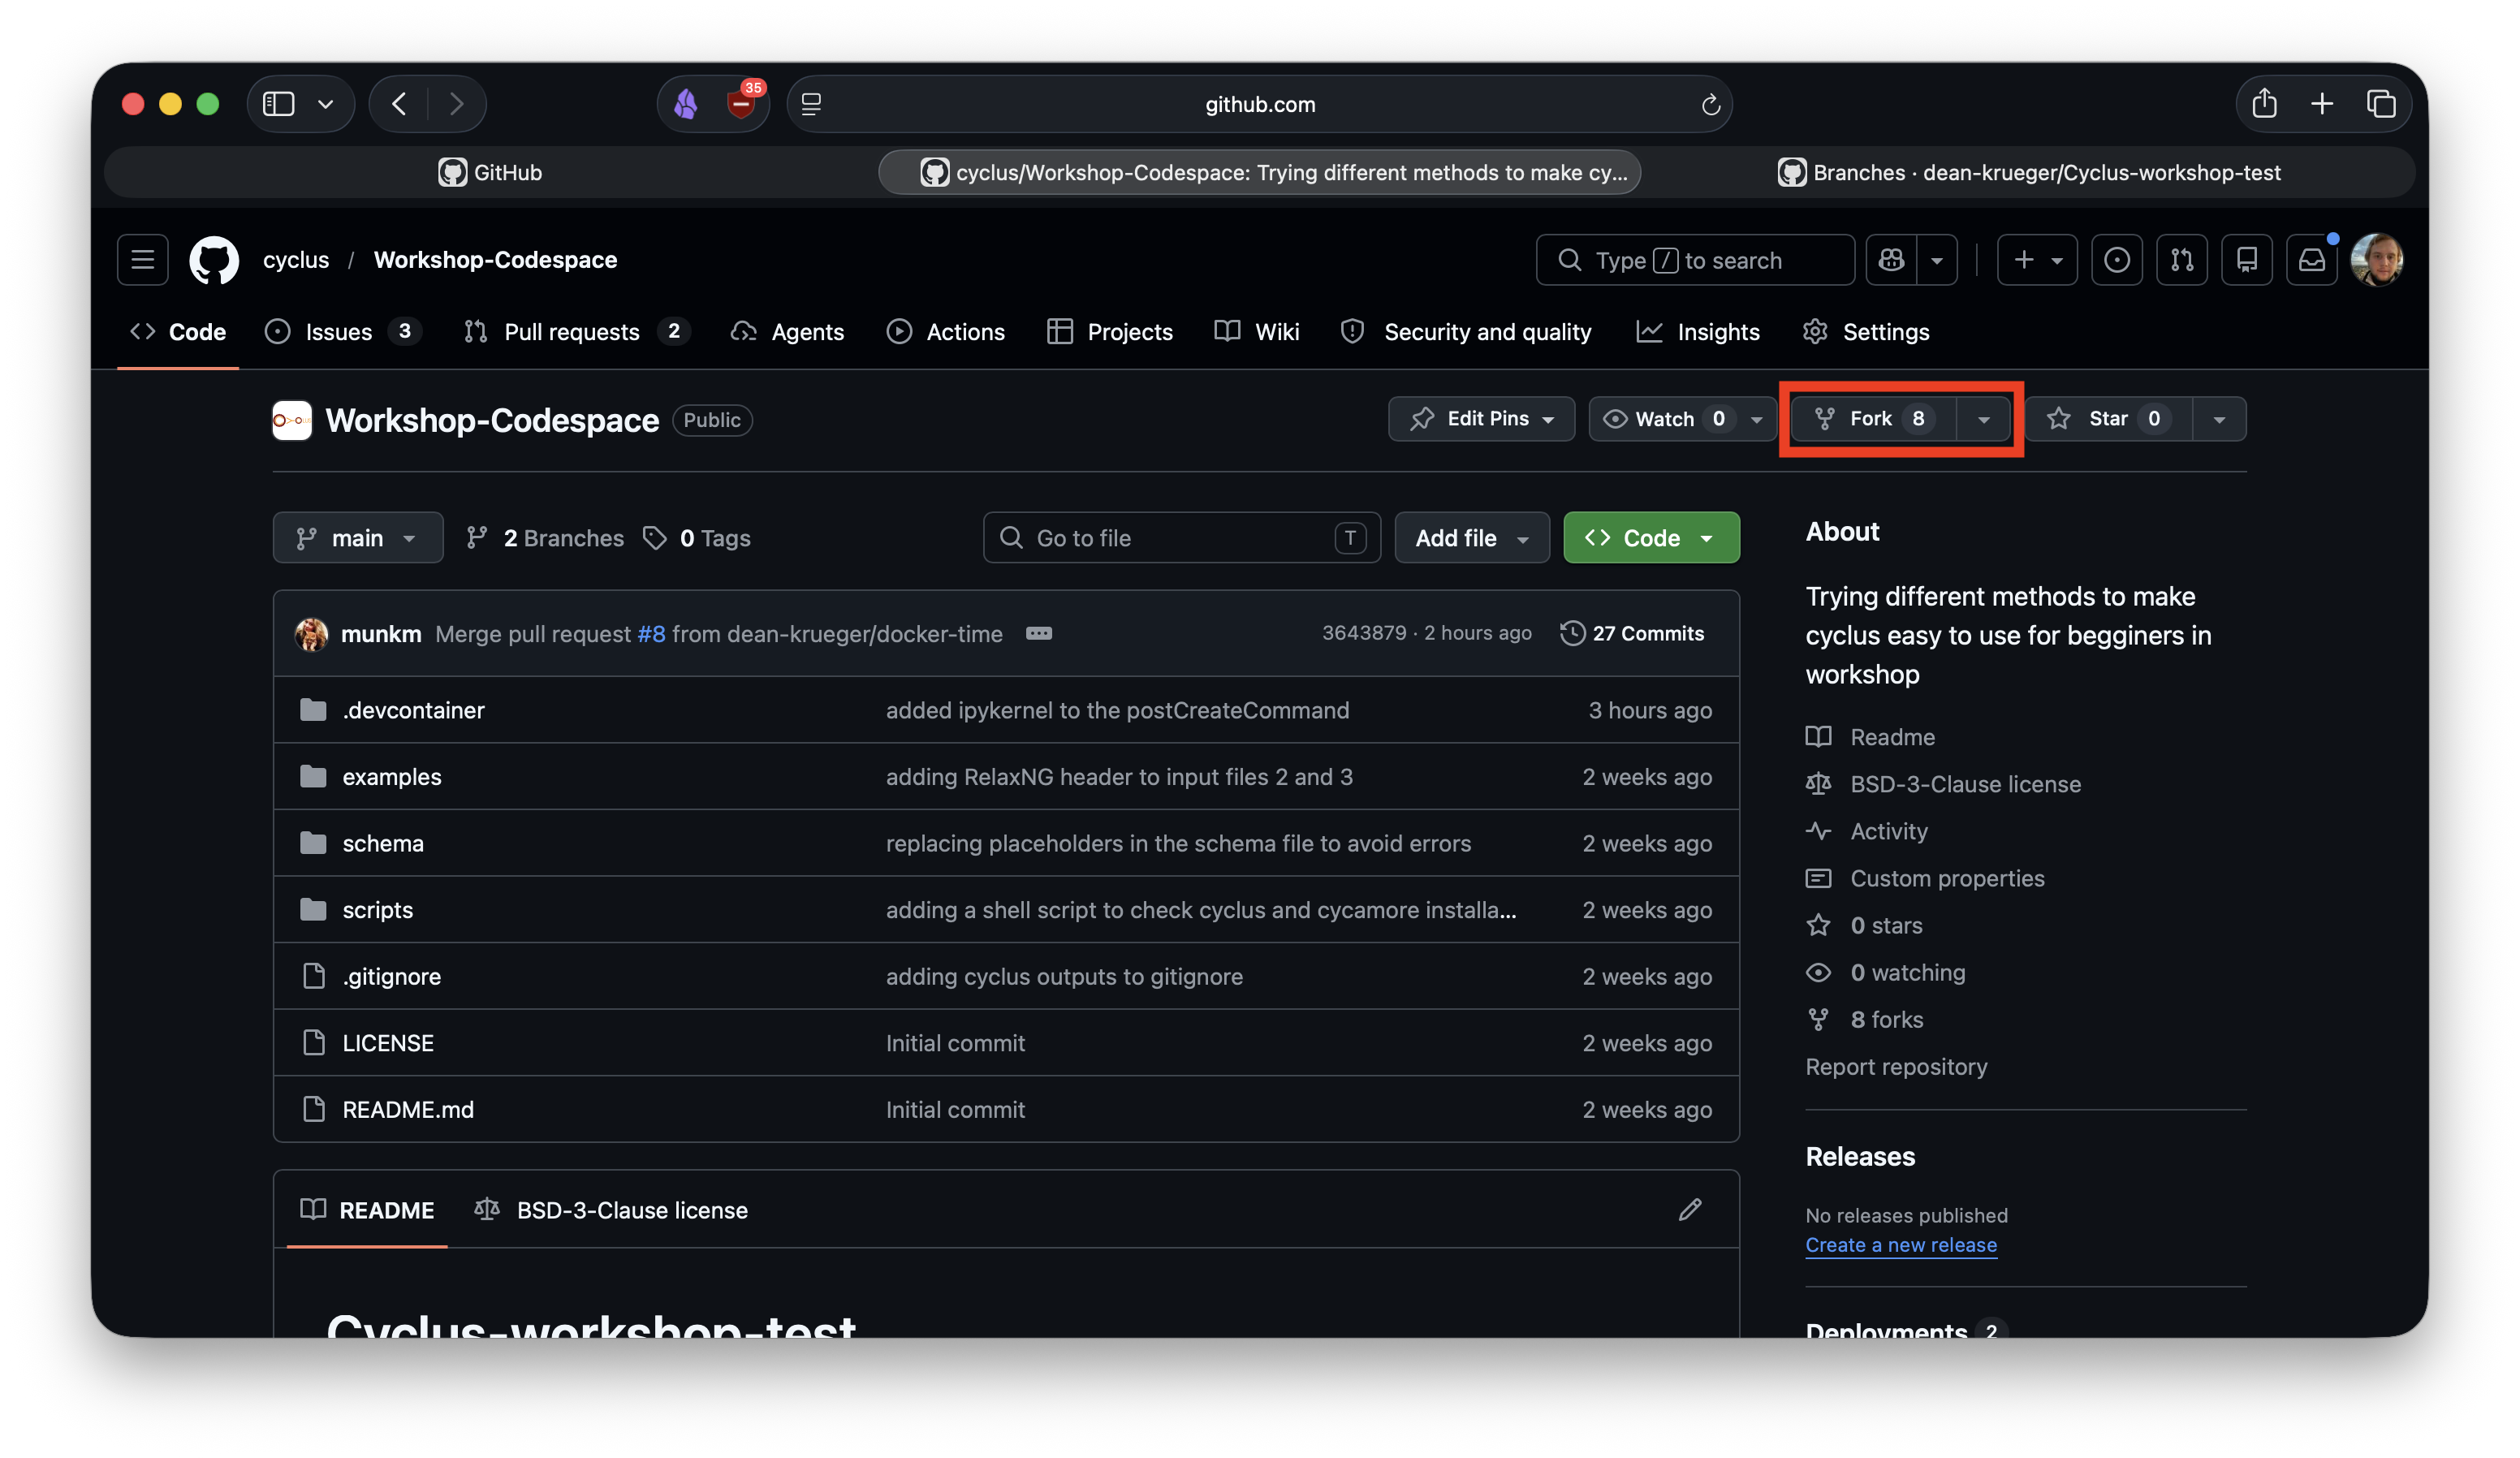
- From the Tutorial Repository page, hit the
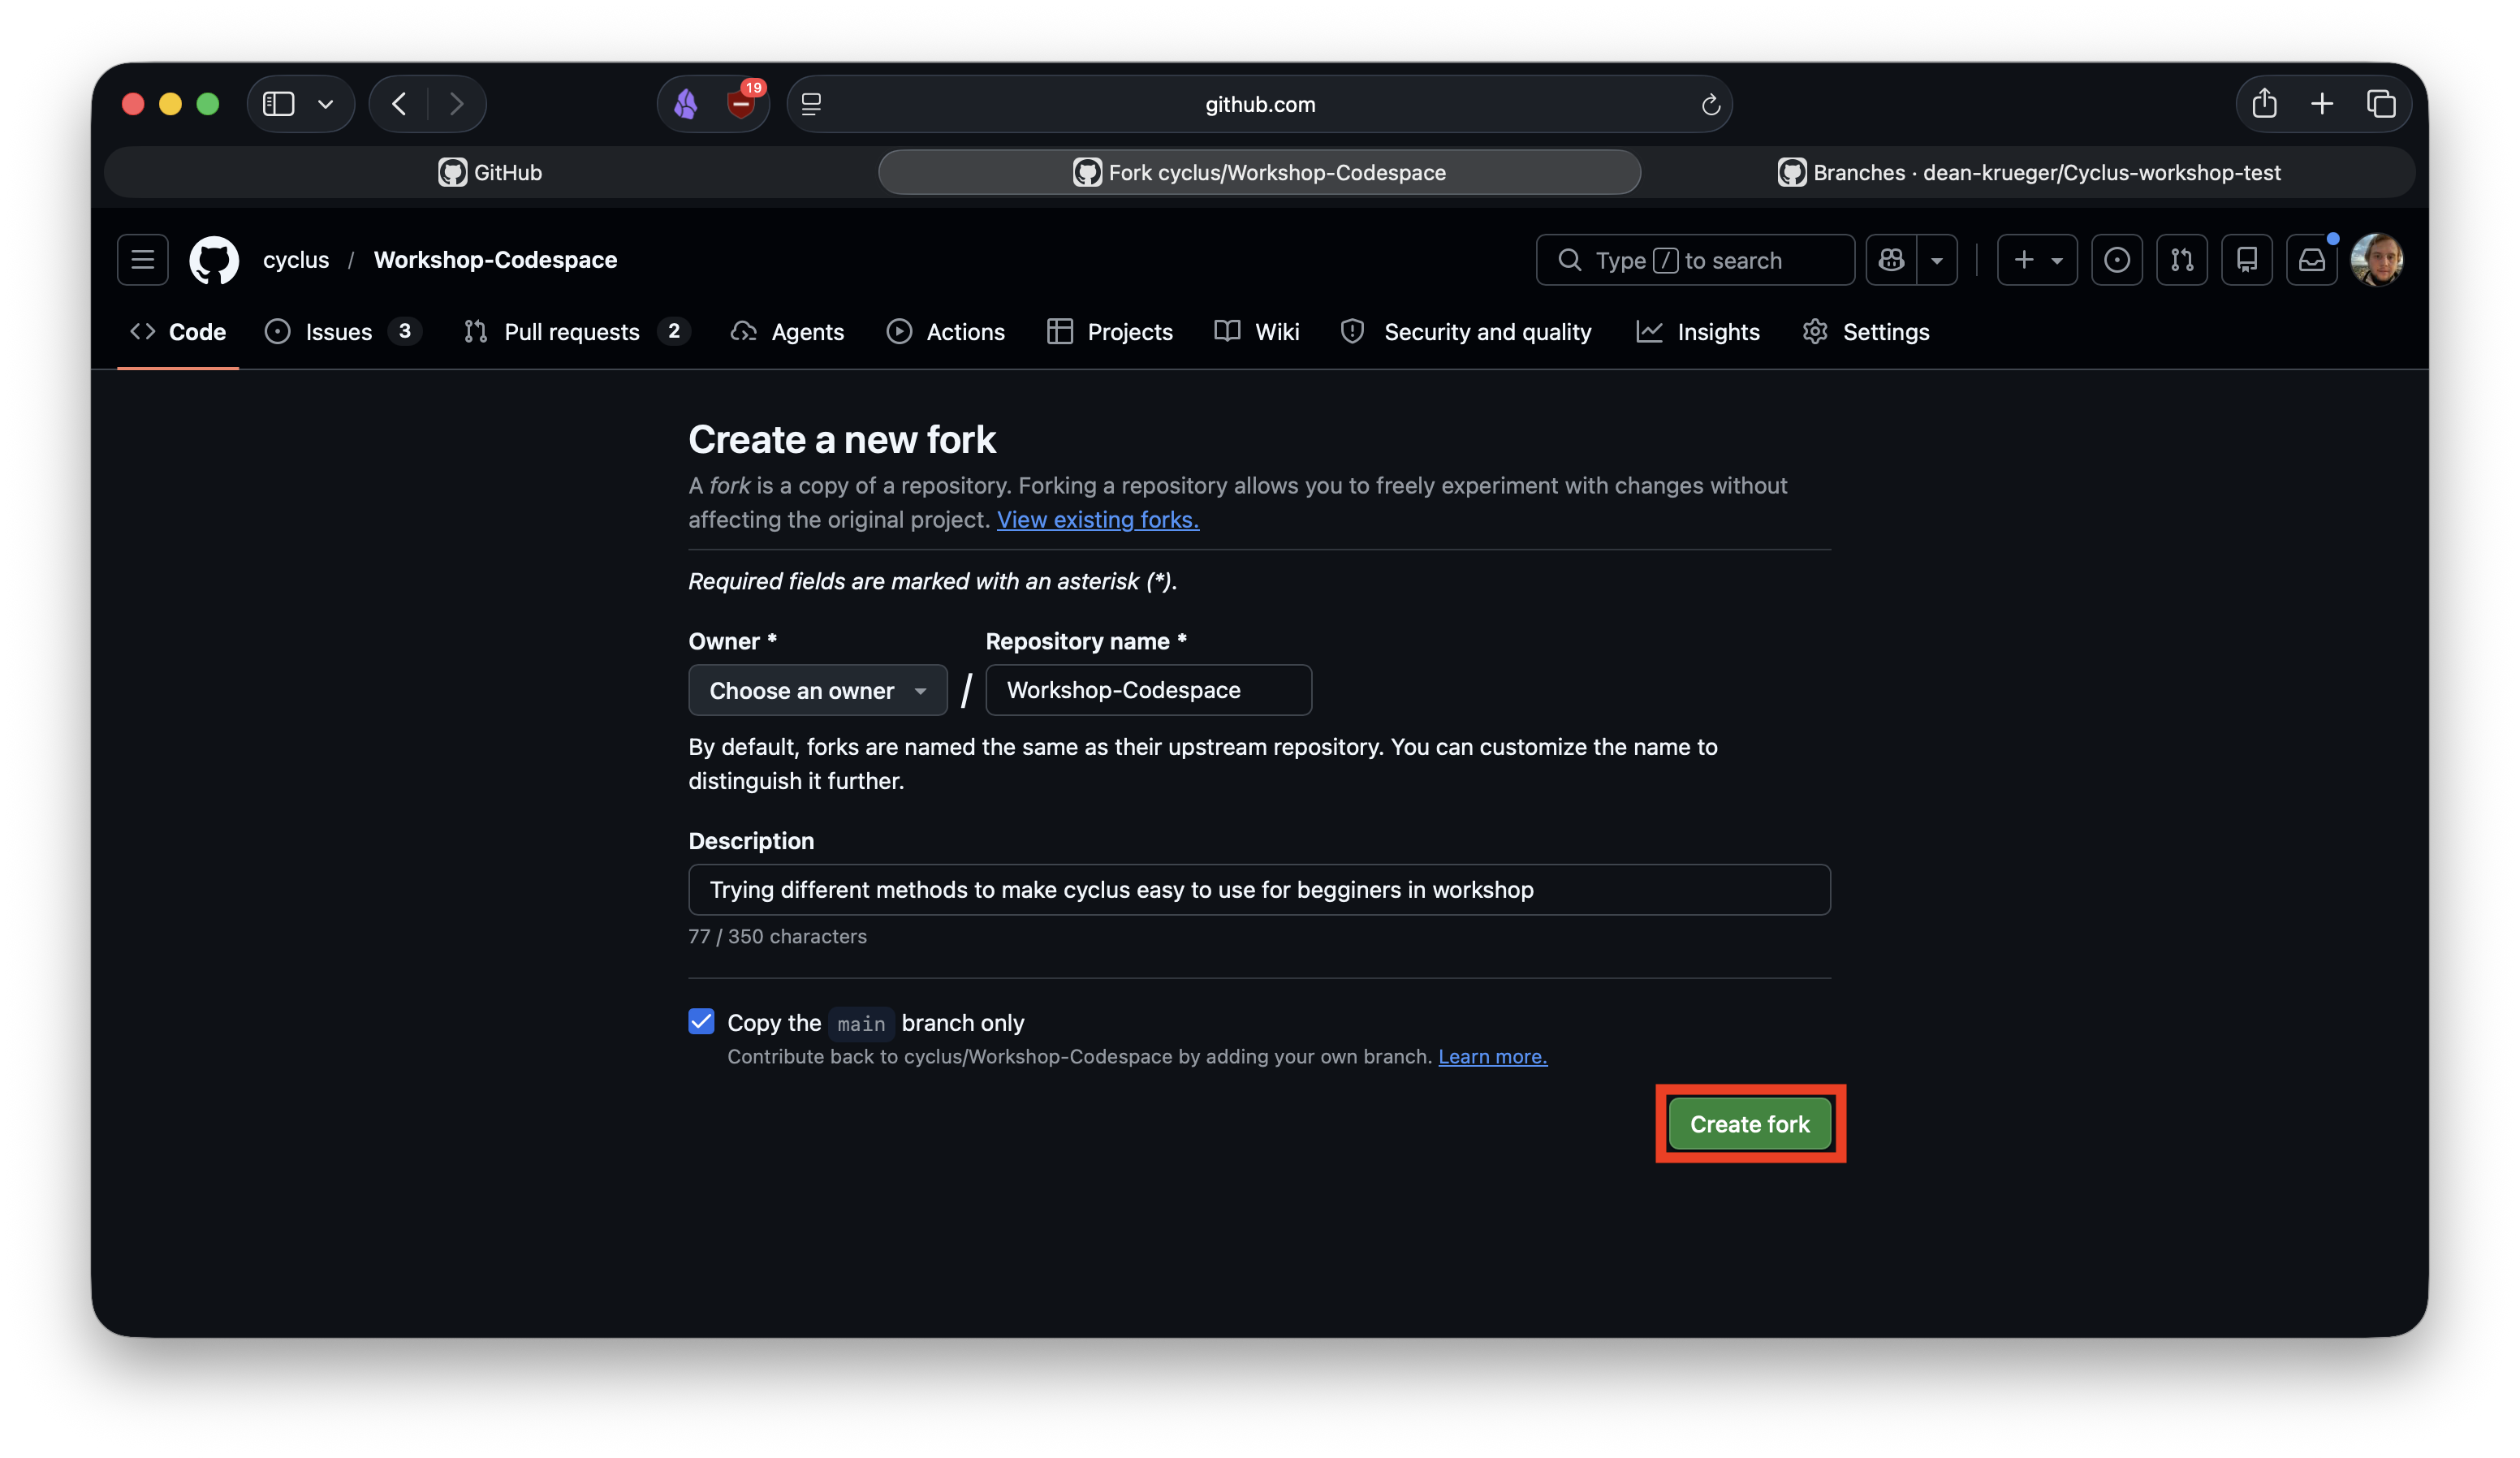
Forkbutton in the top right of the page to make a copy of the repository associated with your GitHub account.
and then press Create fork
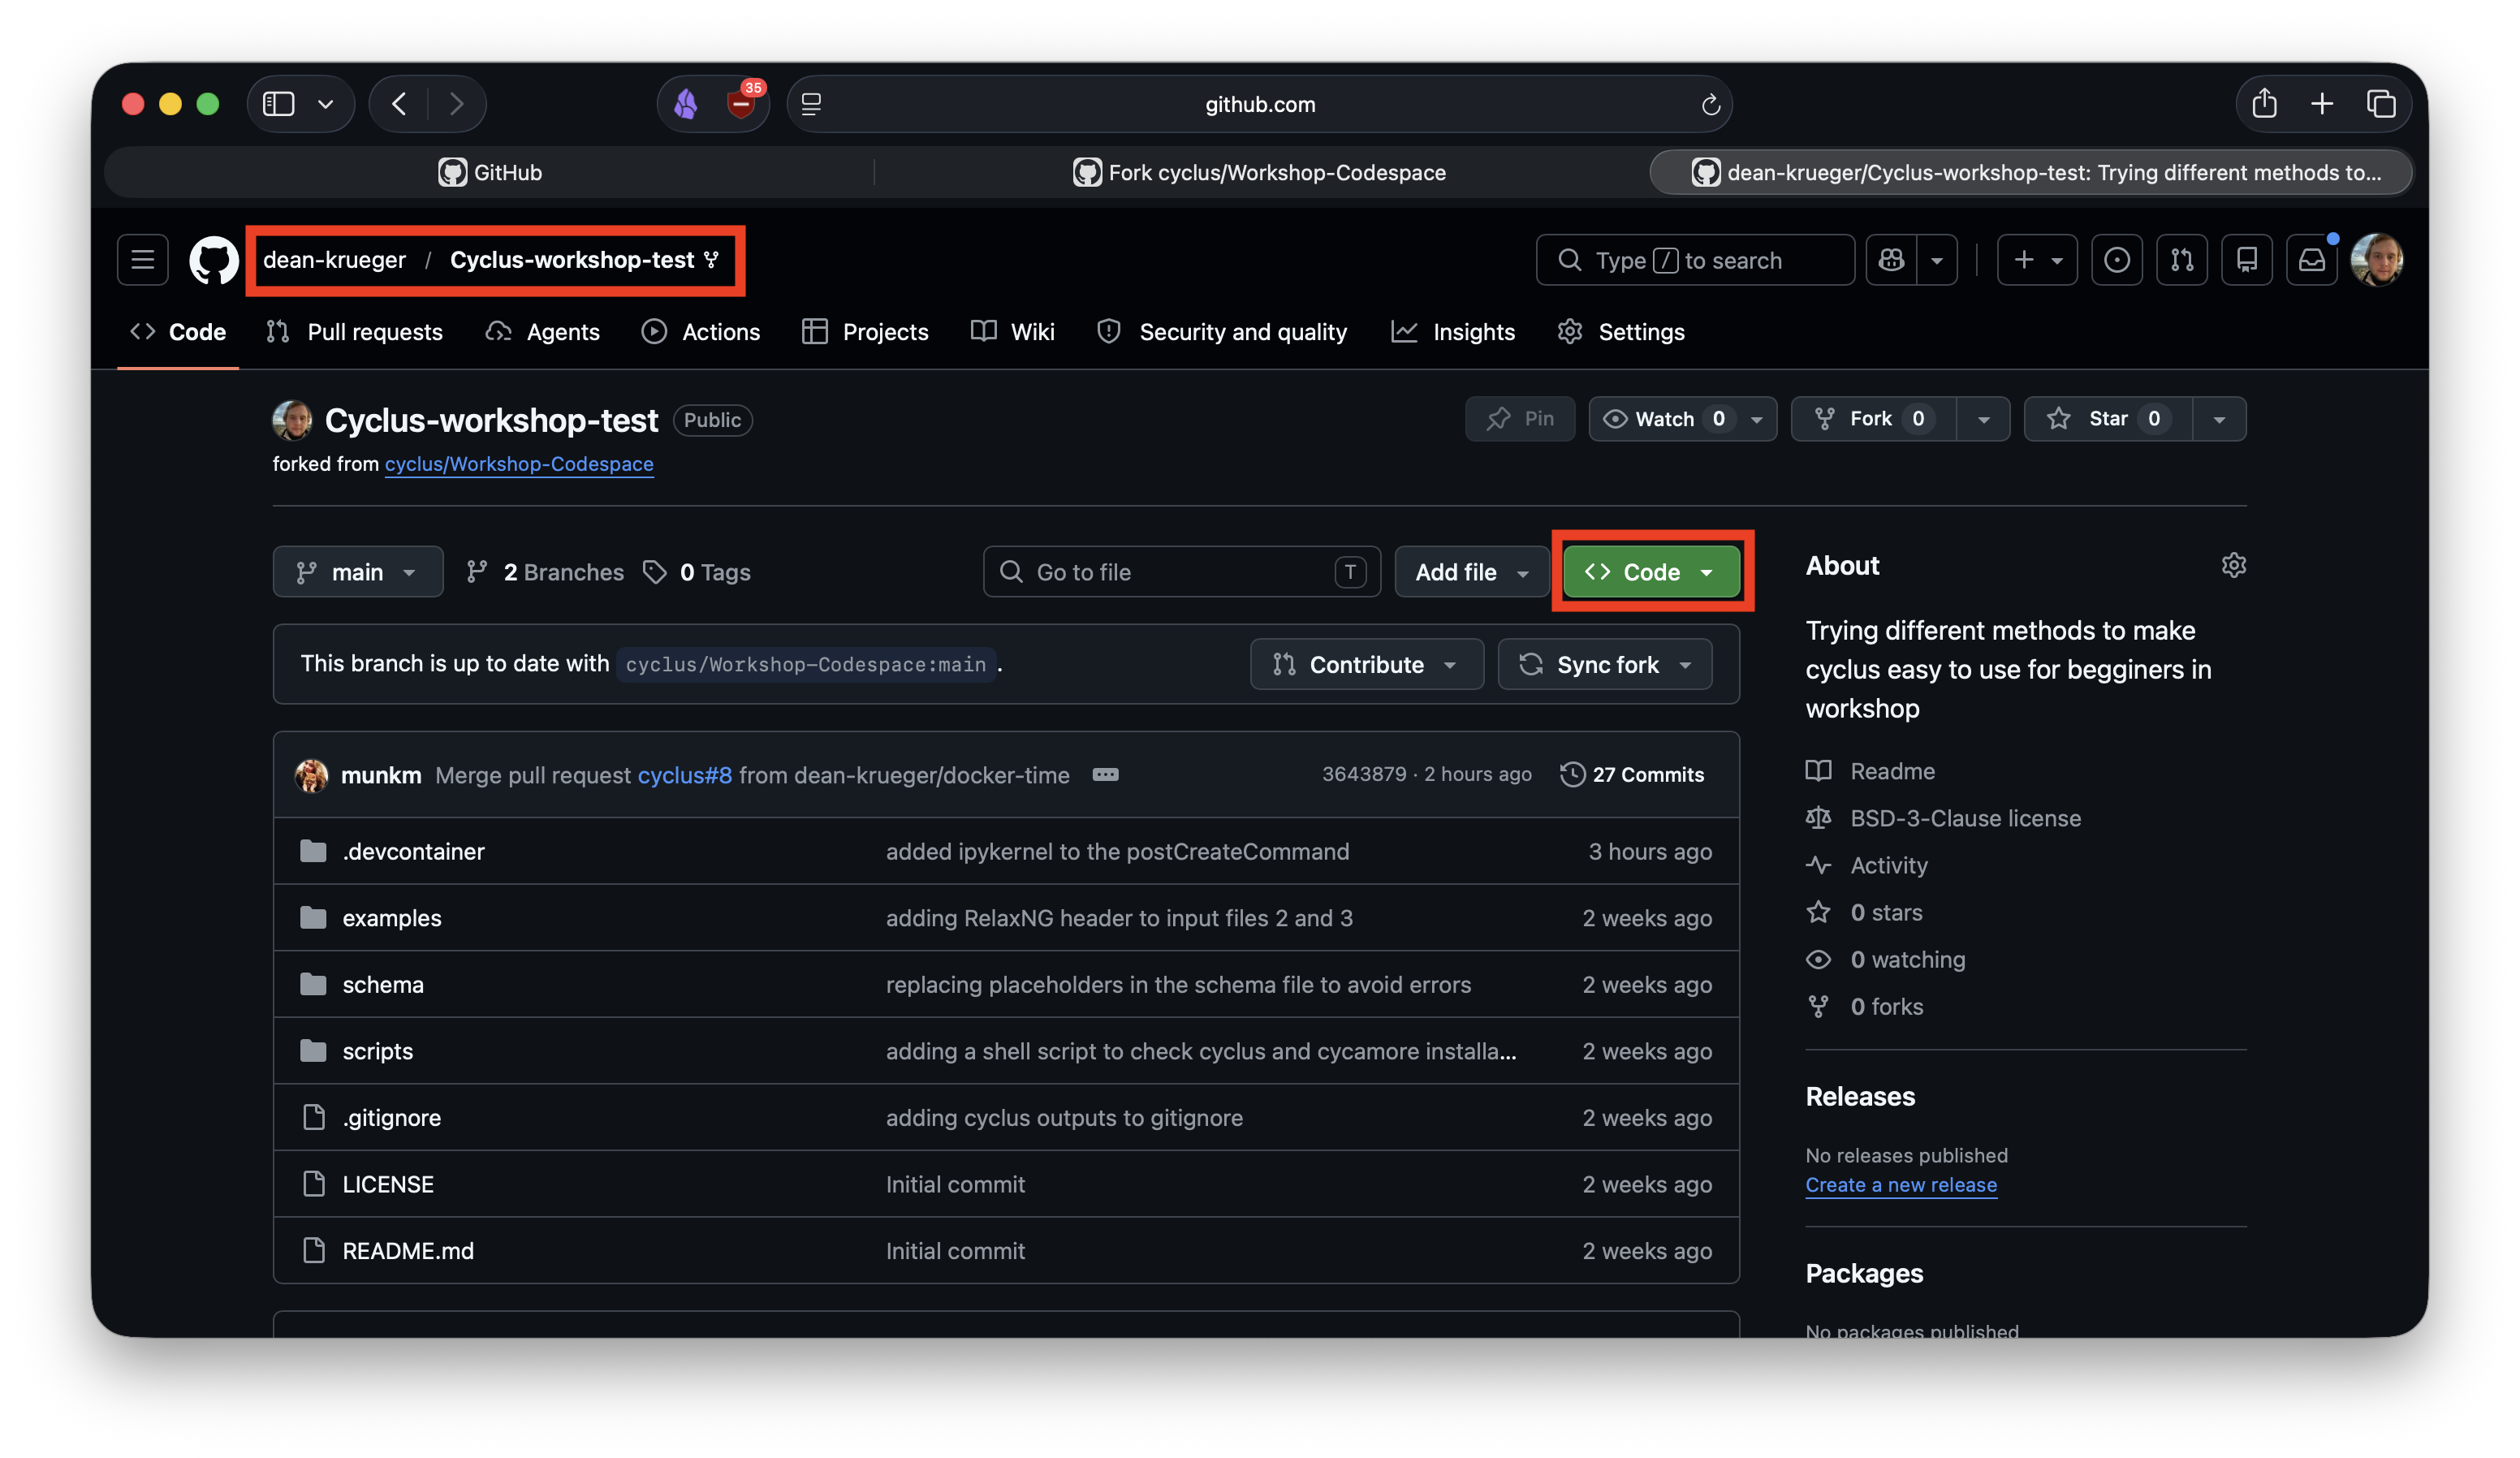
- Check that you are now on the GitHub page of your fork (the URL should have
changed from https://github.com/cyclus/Workshop-Codespace to something like
https://github.com/your-username/Workshop-Codespace). Once you are, press the
green
Codebutton:
which should bring up a menu that looks like this:
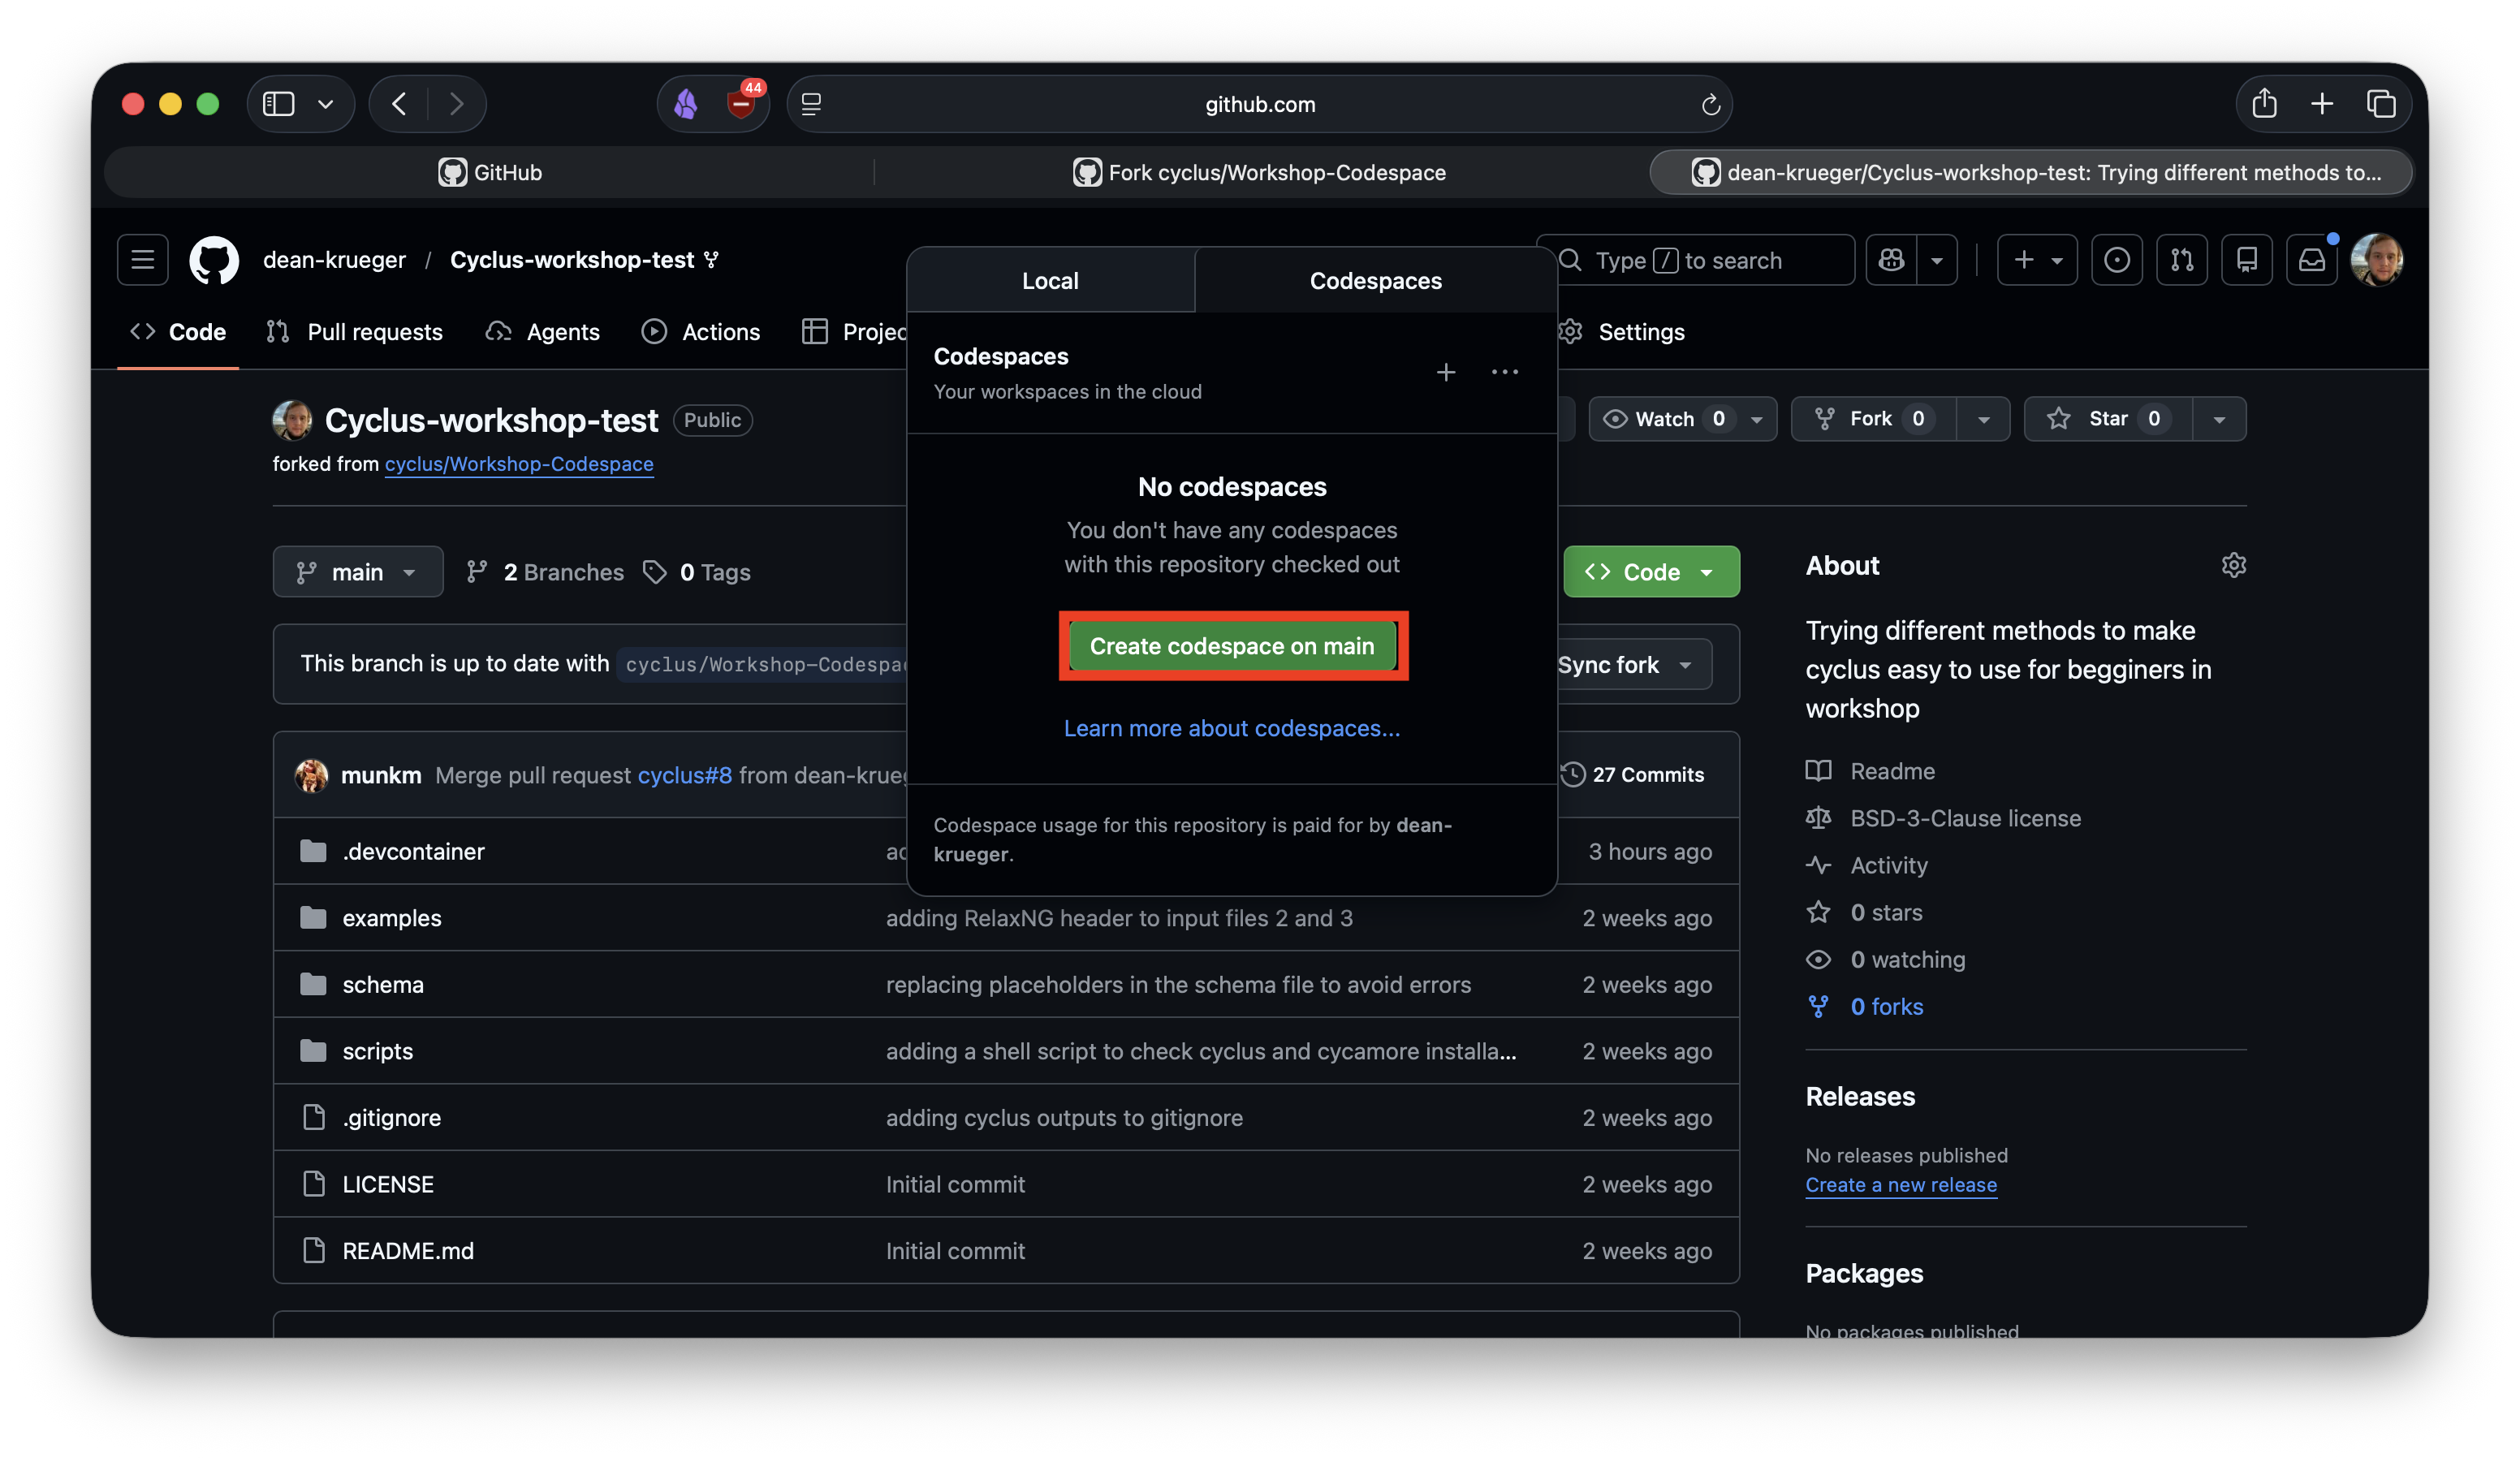
Note that you may need to click the Codespace button in the menu that appears
to see the above.
- Click the green
Create Codespacebutton within the menu shown above to create a GitHub Codespace. This will open up a new browser tab and place you in a VS Code development environment inside your browser withCycluspre-installed and configured. While it is loading, do not hit any buttons. It will take up to 10 minutes to fully initialize. During this initialization, it will look like this:
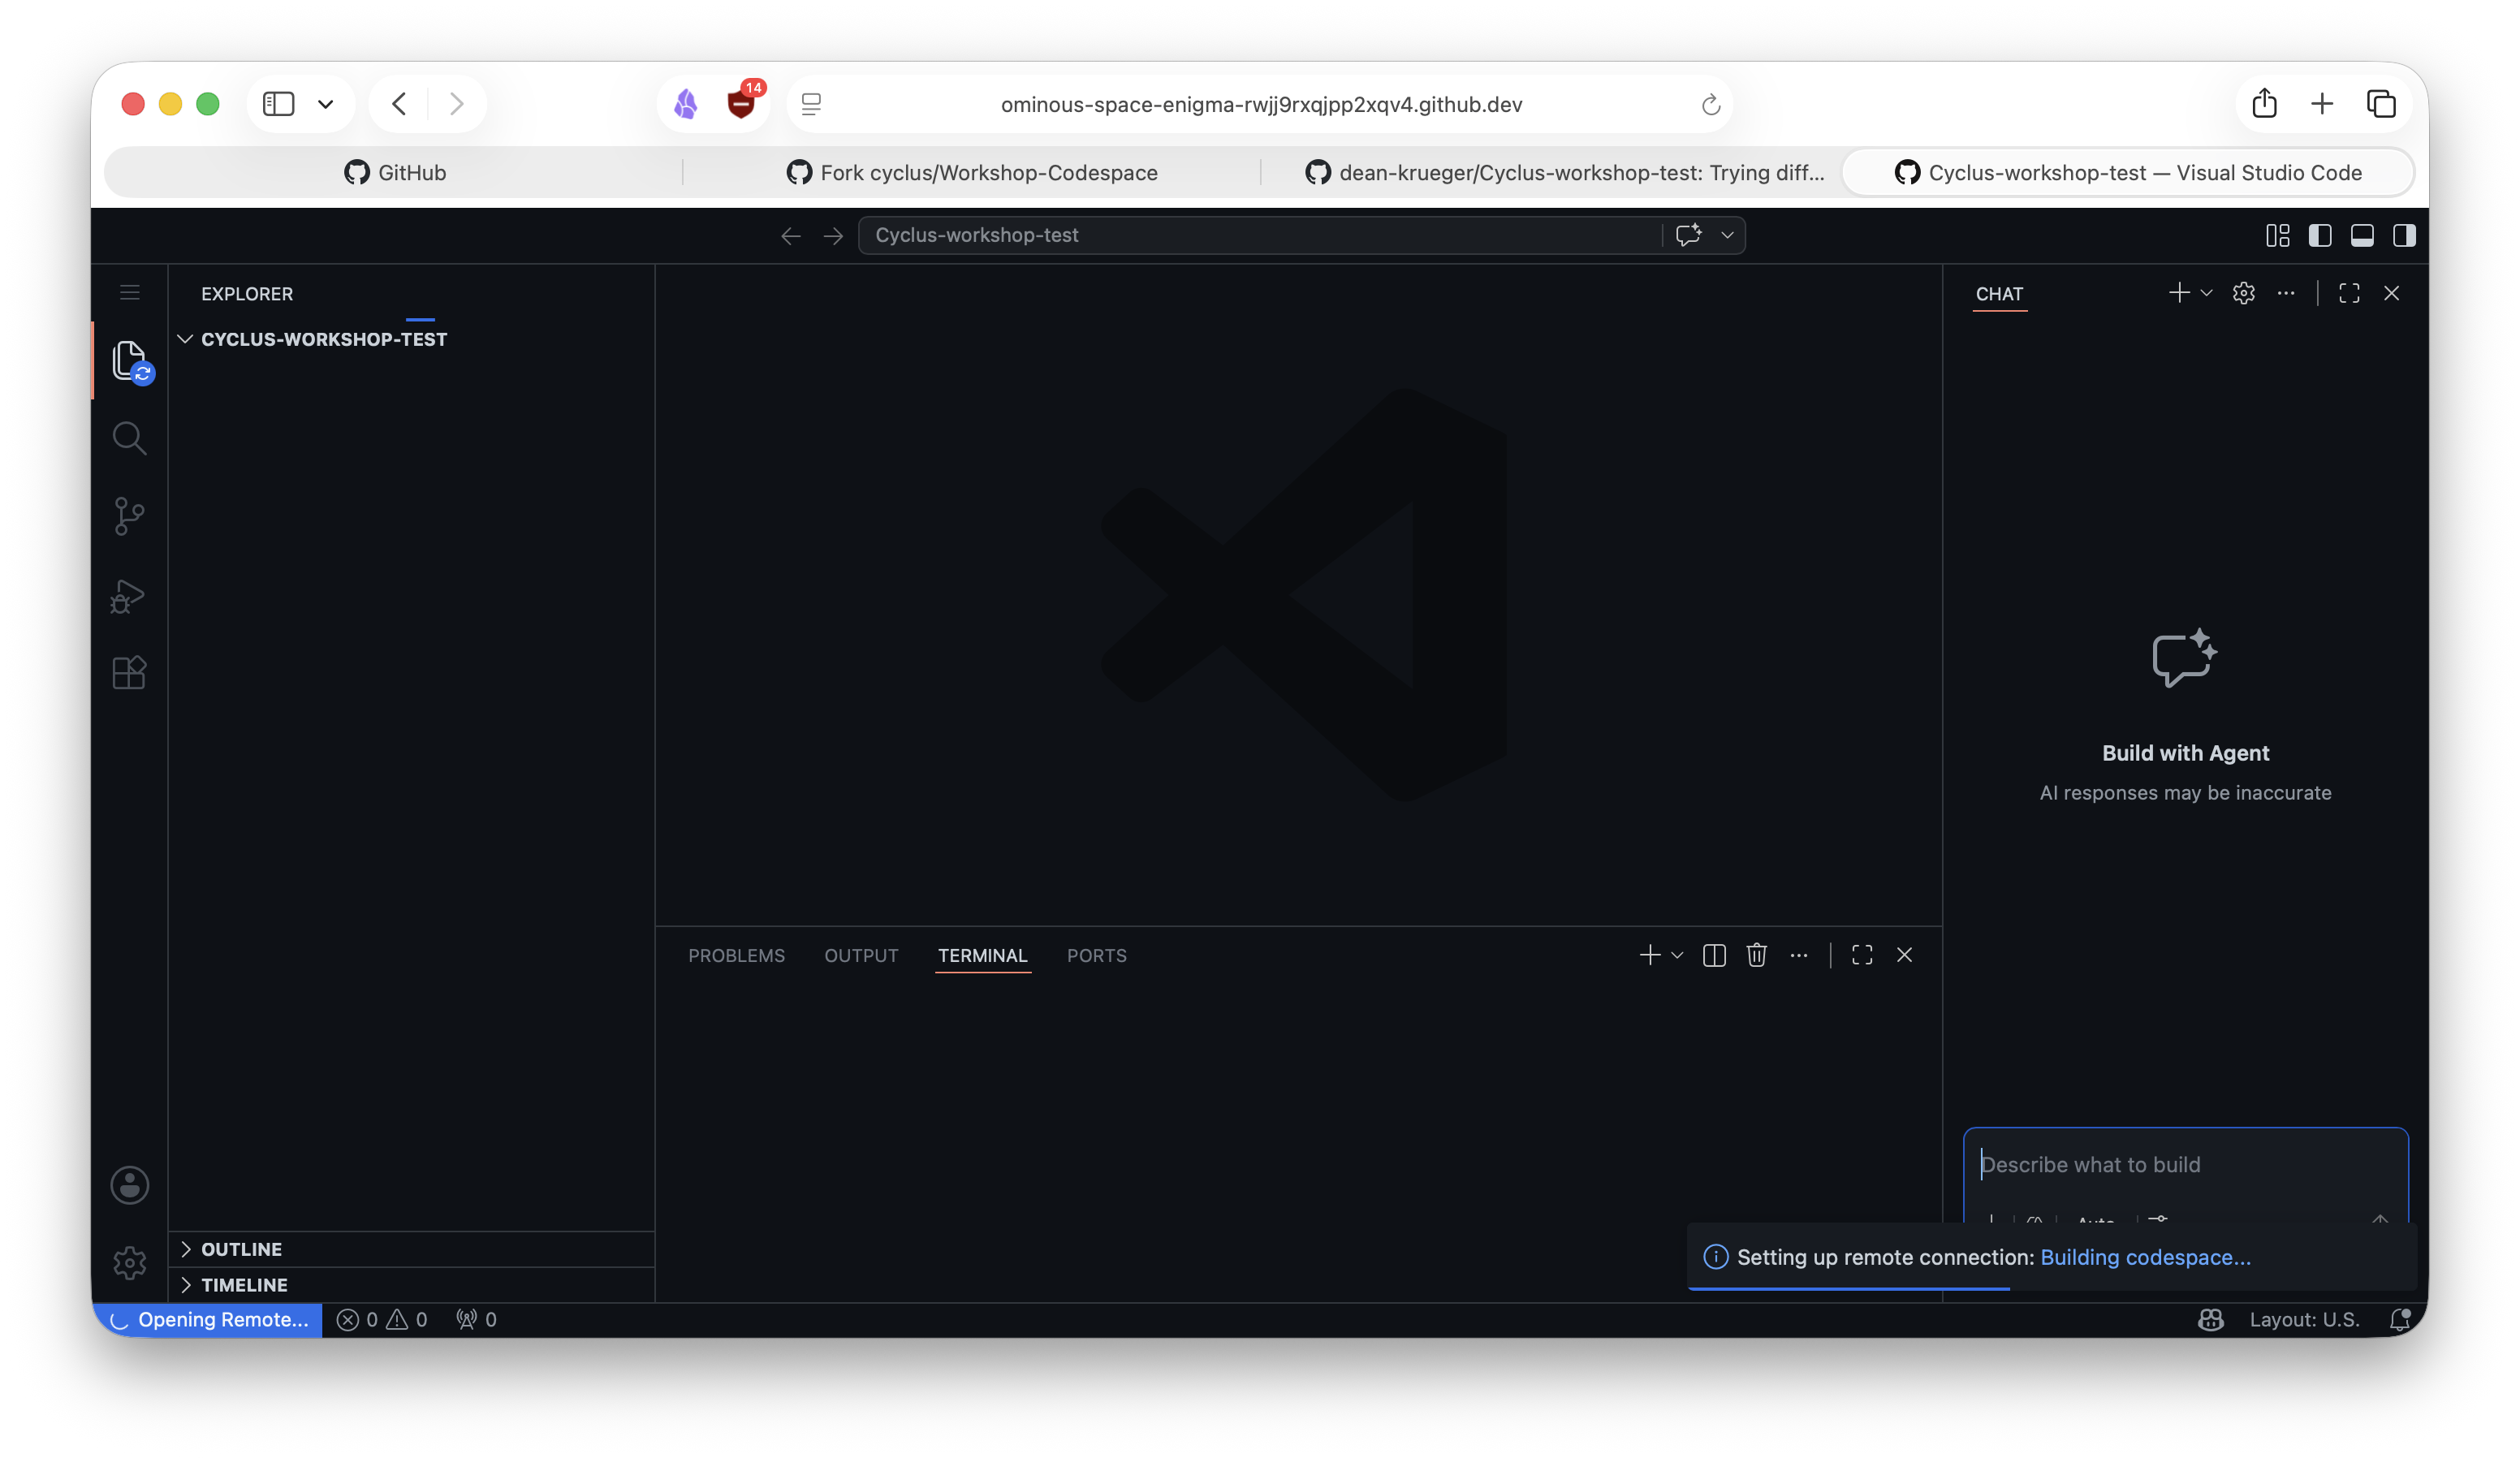
If you run into a problem with initialization, it should be safe to refresh the page. We have found that this typically solves any issues.
[Step 3] Tour of VS Code
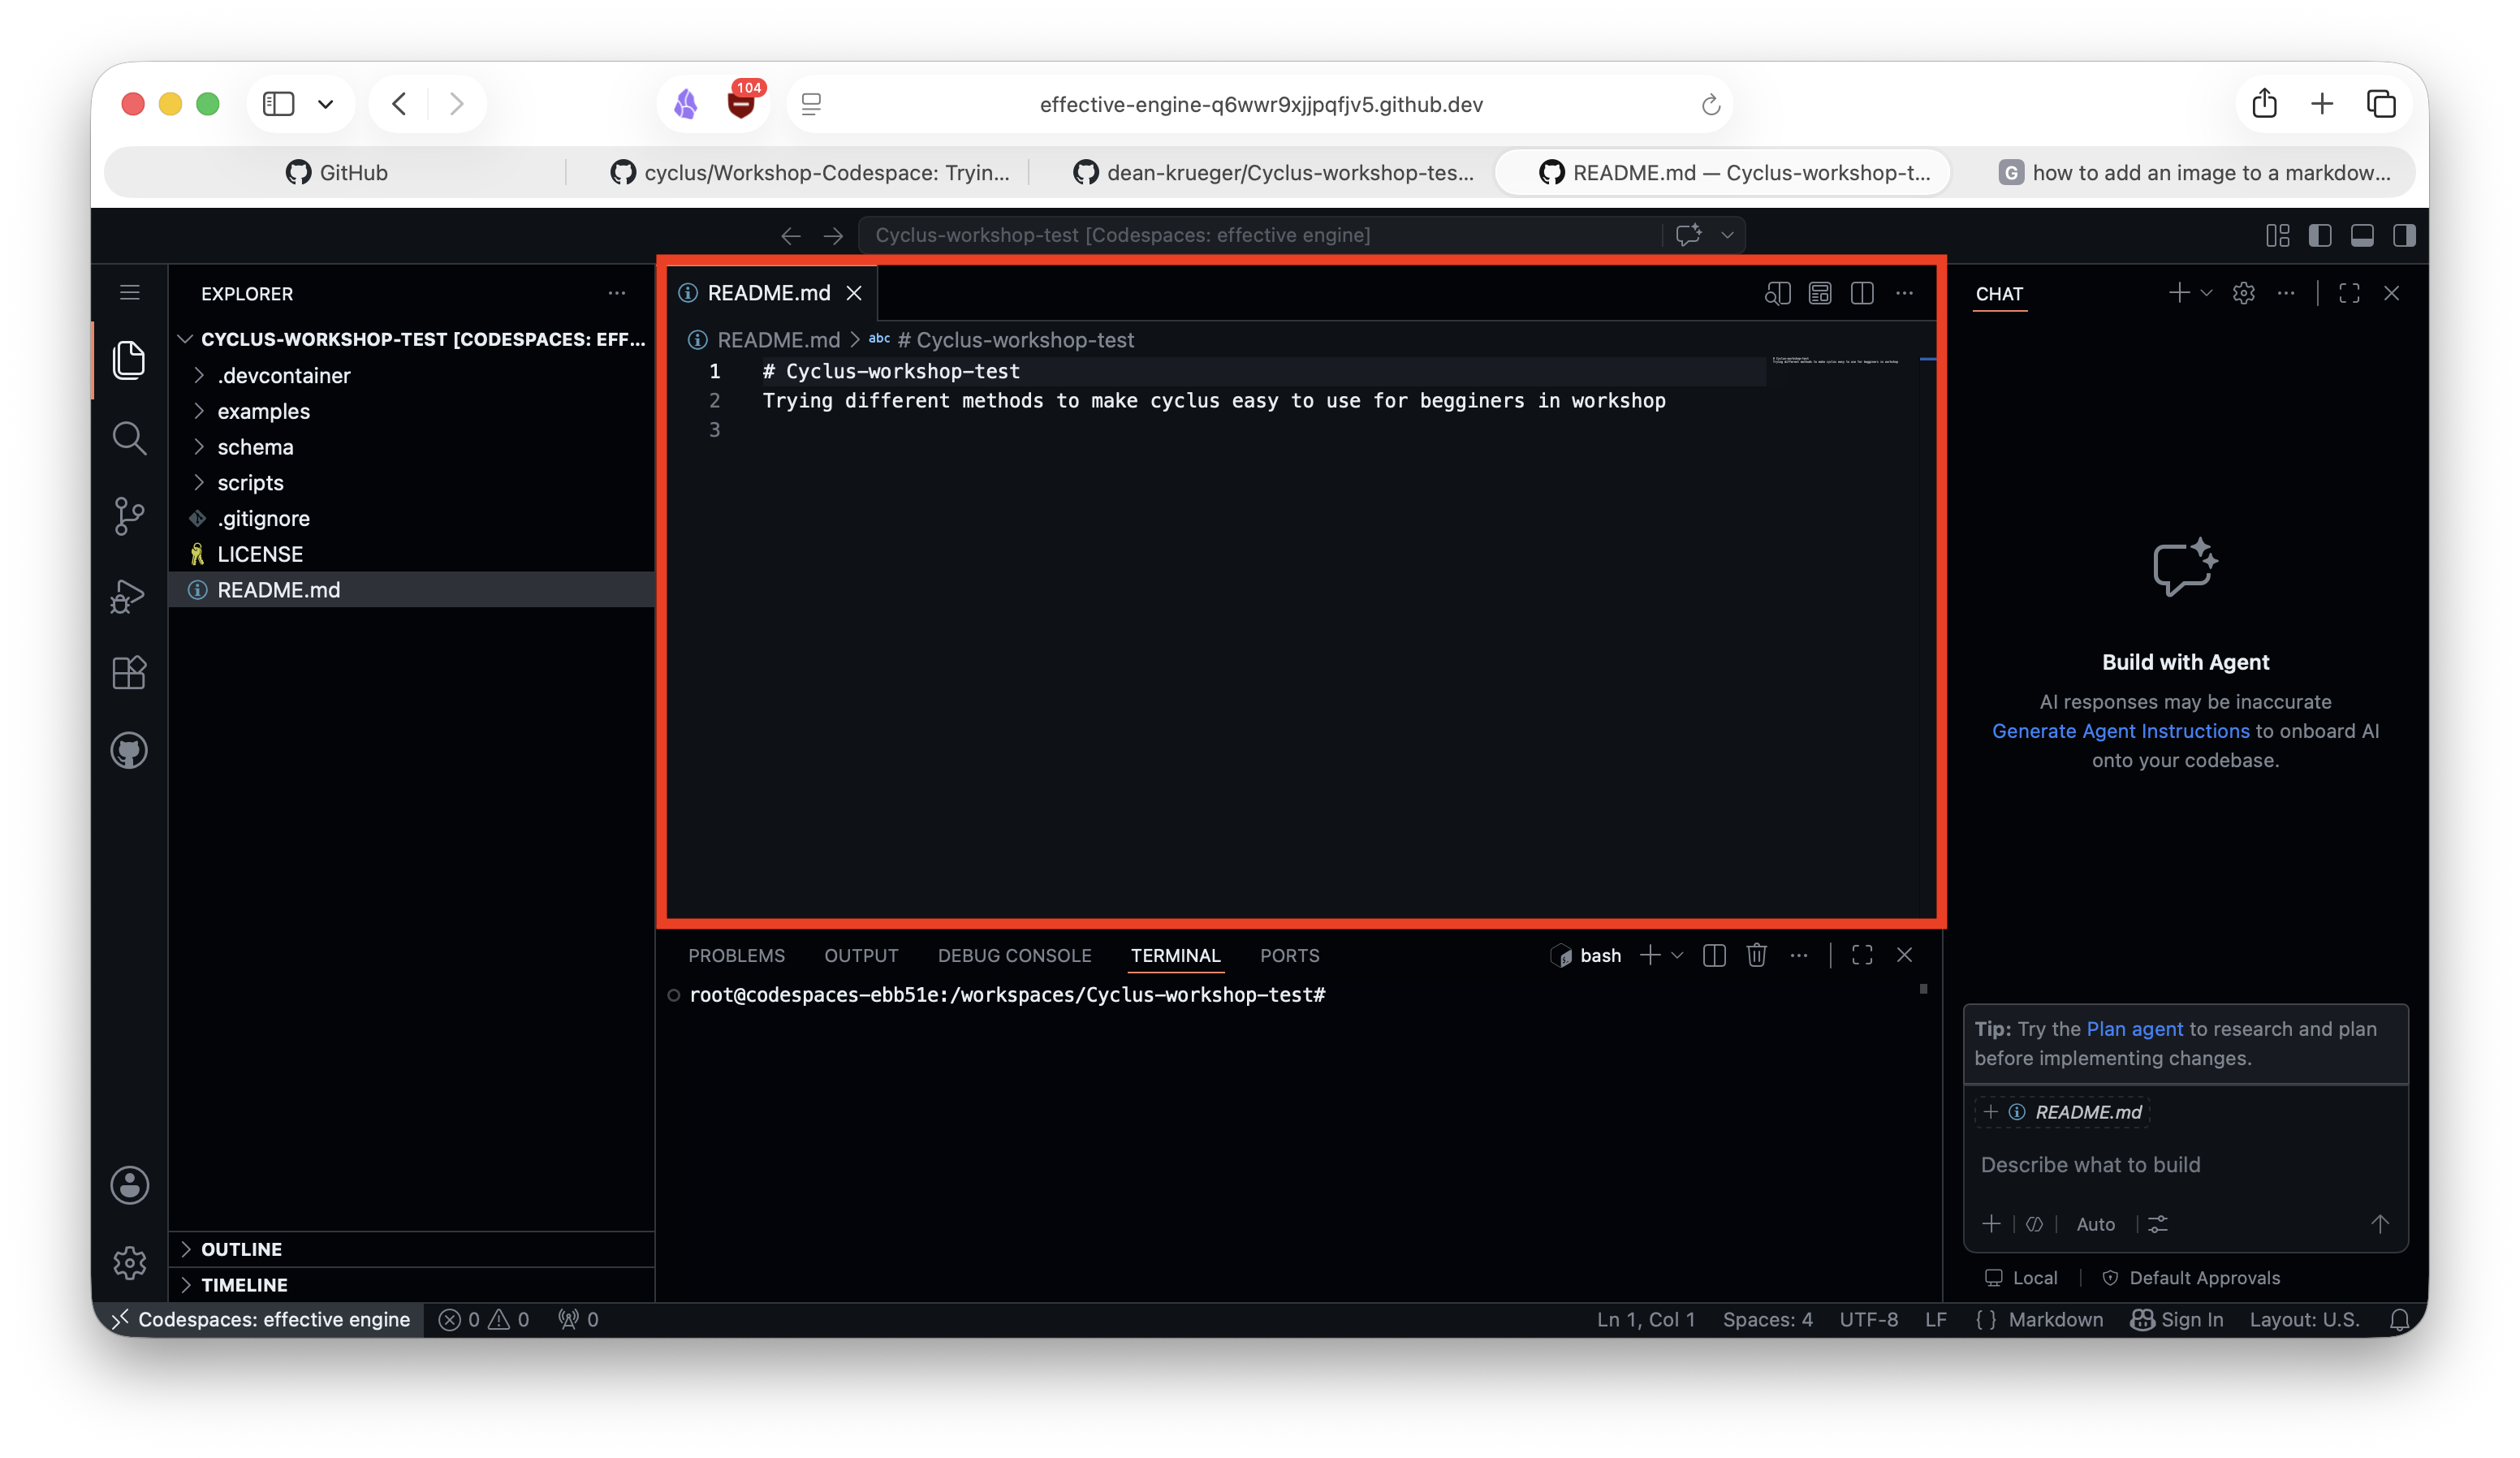
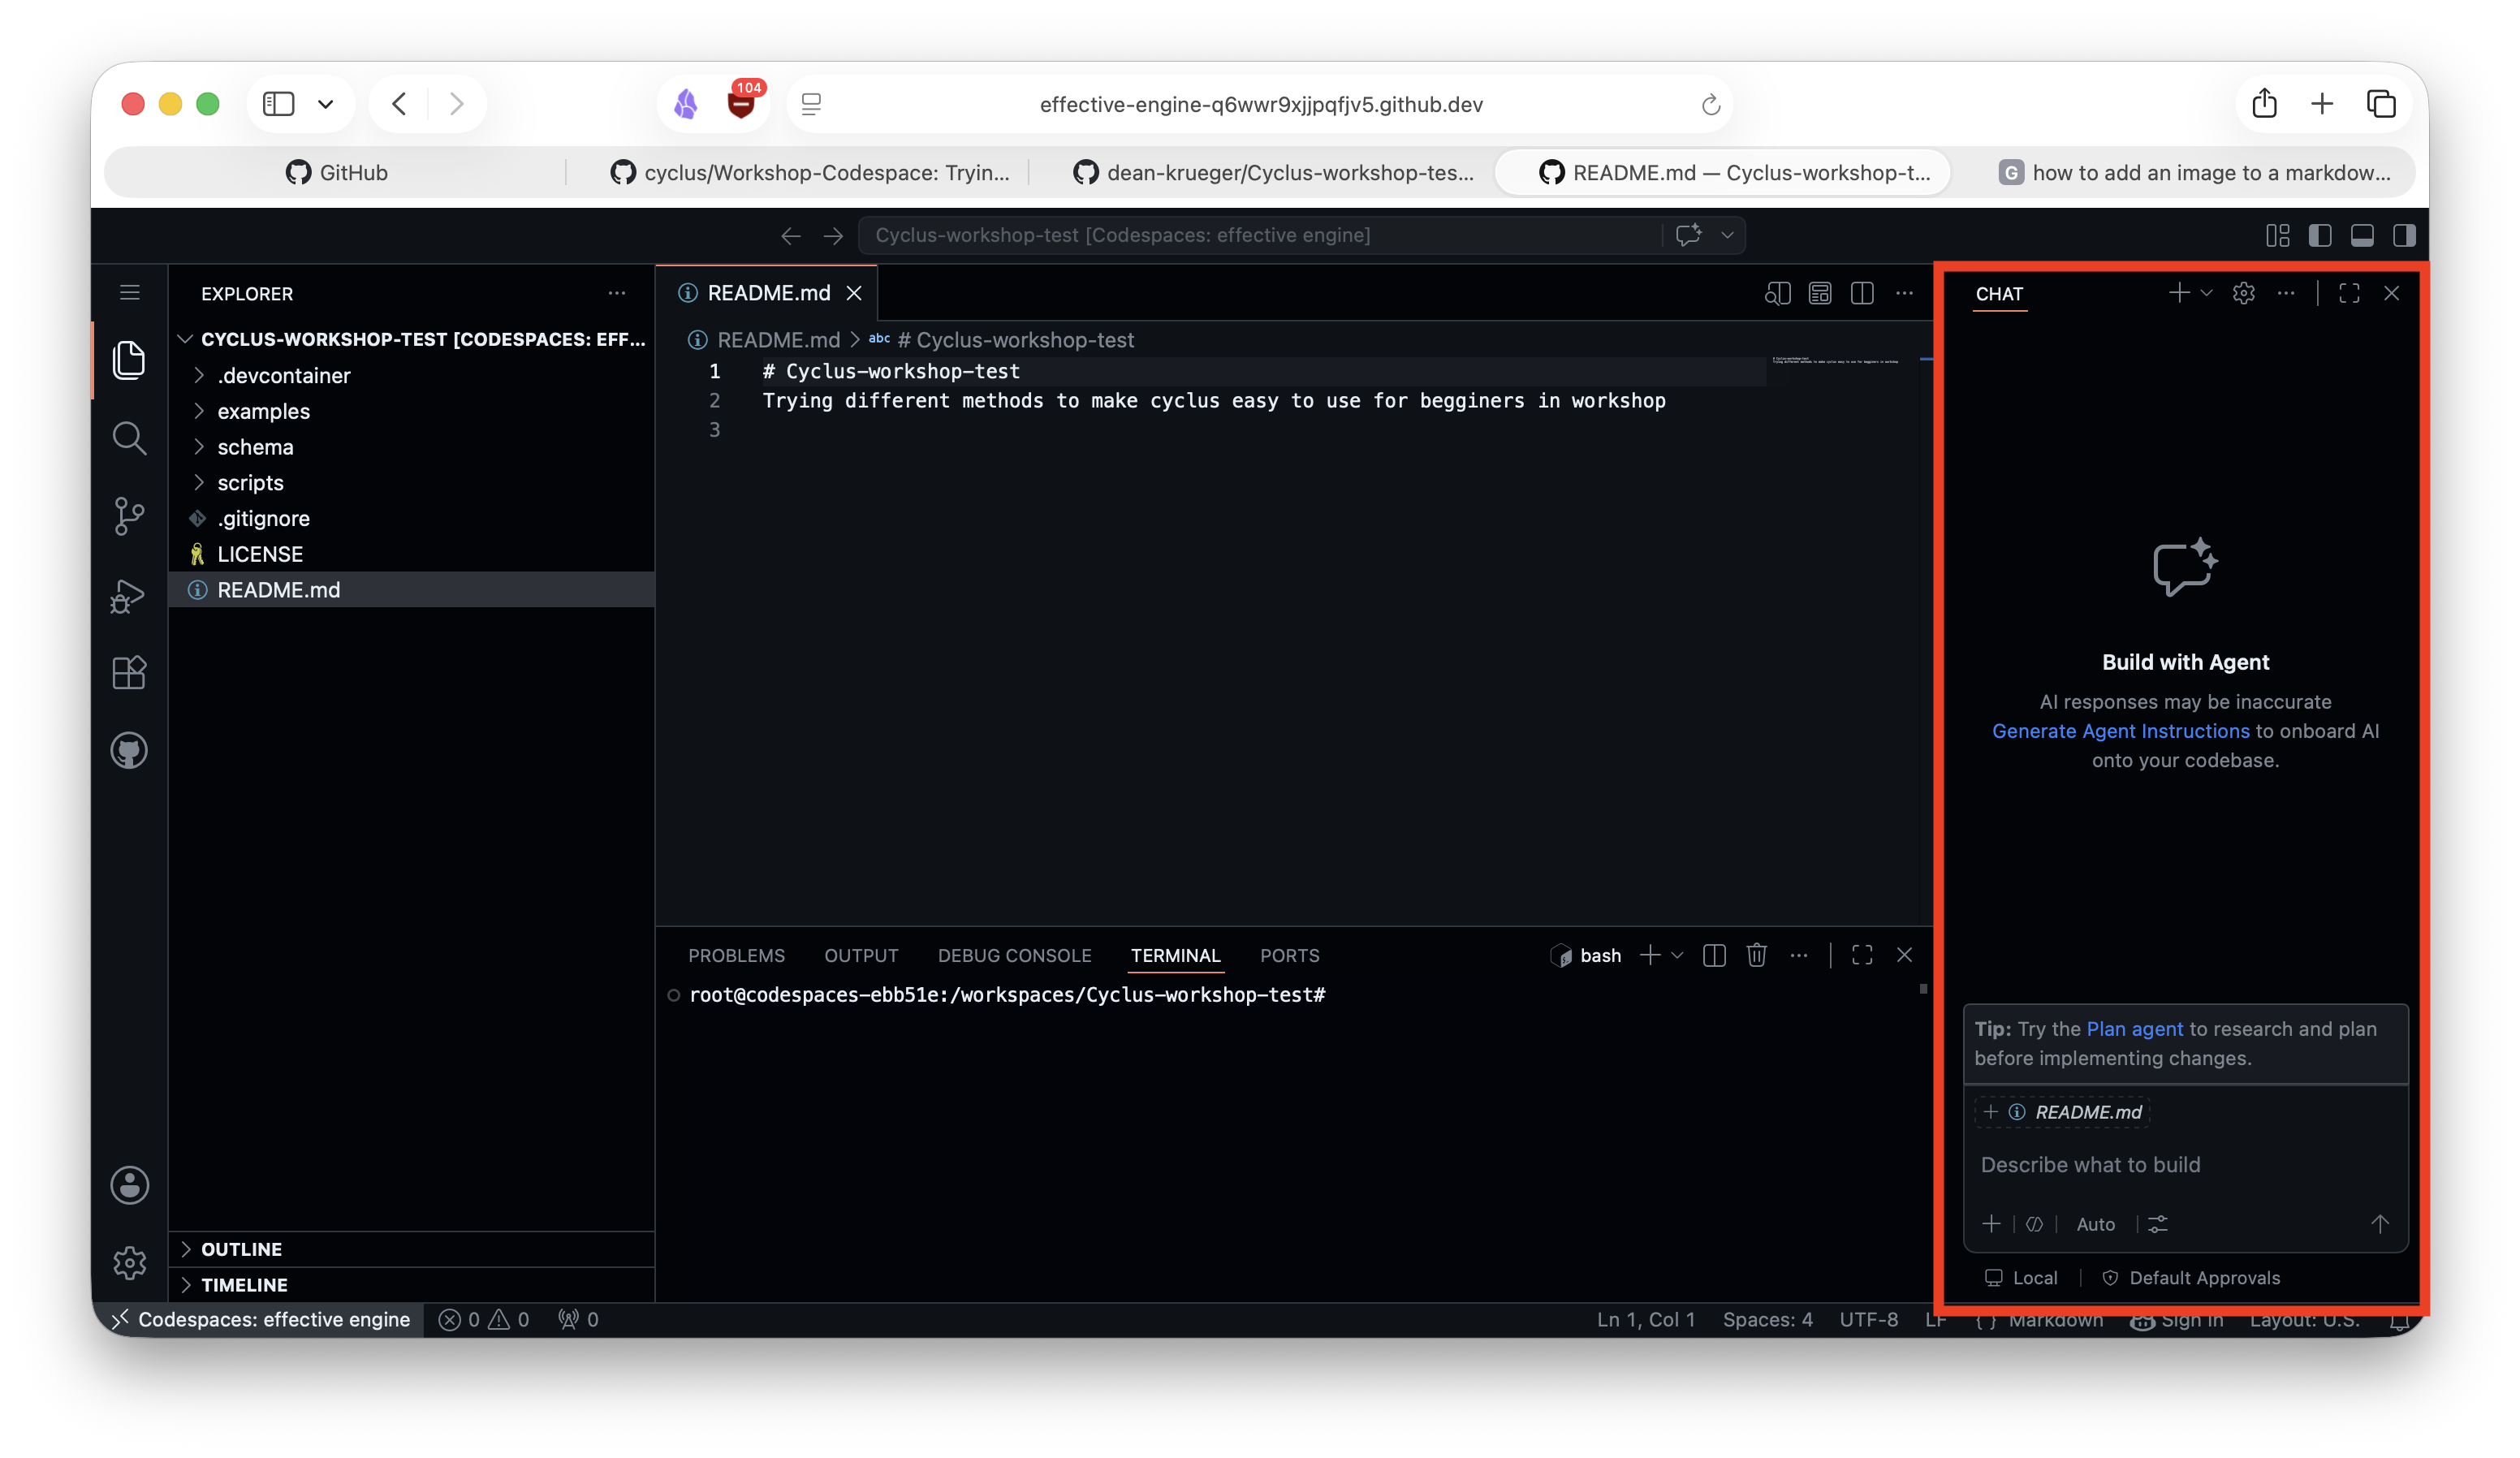
VS Code is an integrated development environment which boasts a variety of helpful plugins, and will be the editor we use for this tutorial. If you would like to see some tips and tricks for working in the VS Code Codespace, we prepared some notes. There are four main “panes” within VS code:
File Editor:
In this pane, you will see open files and can edit their contents.
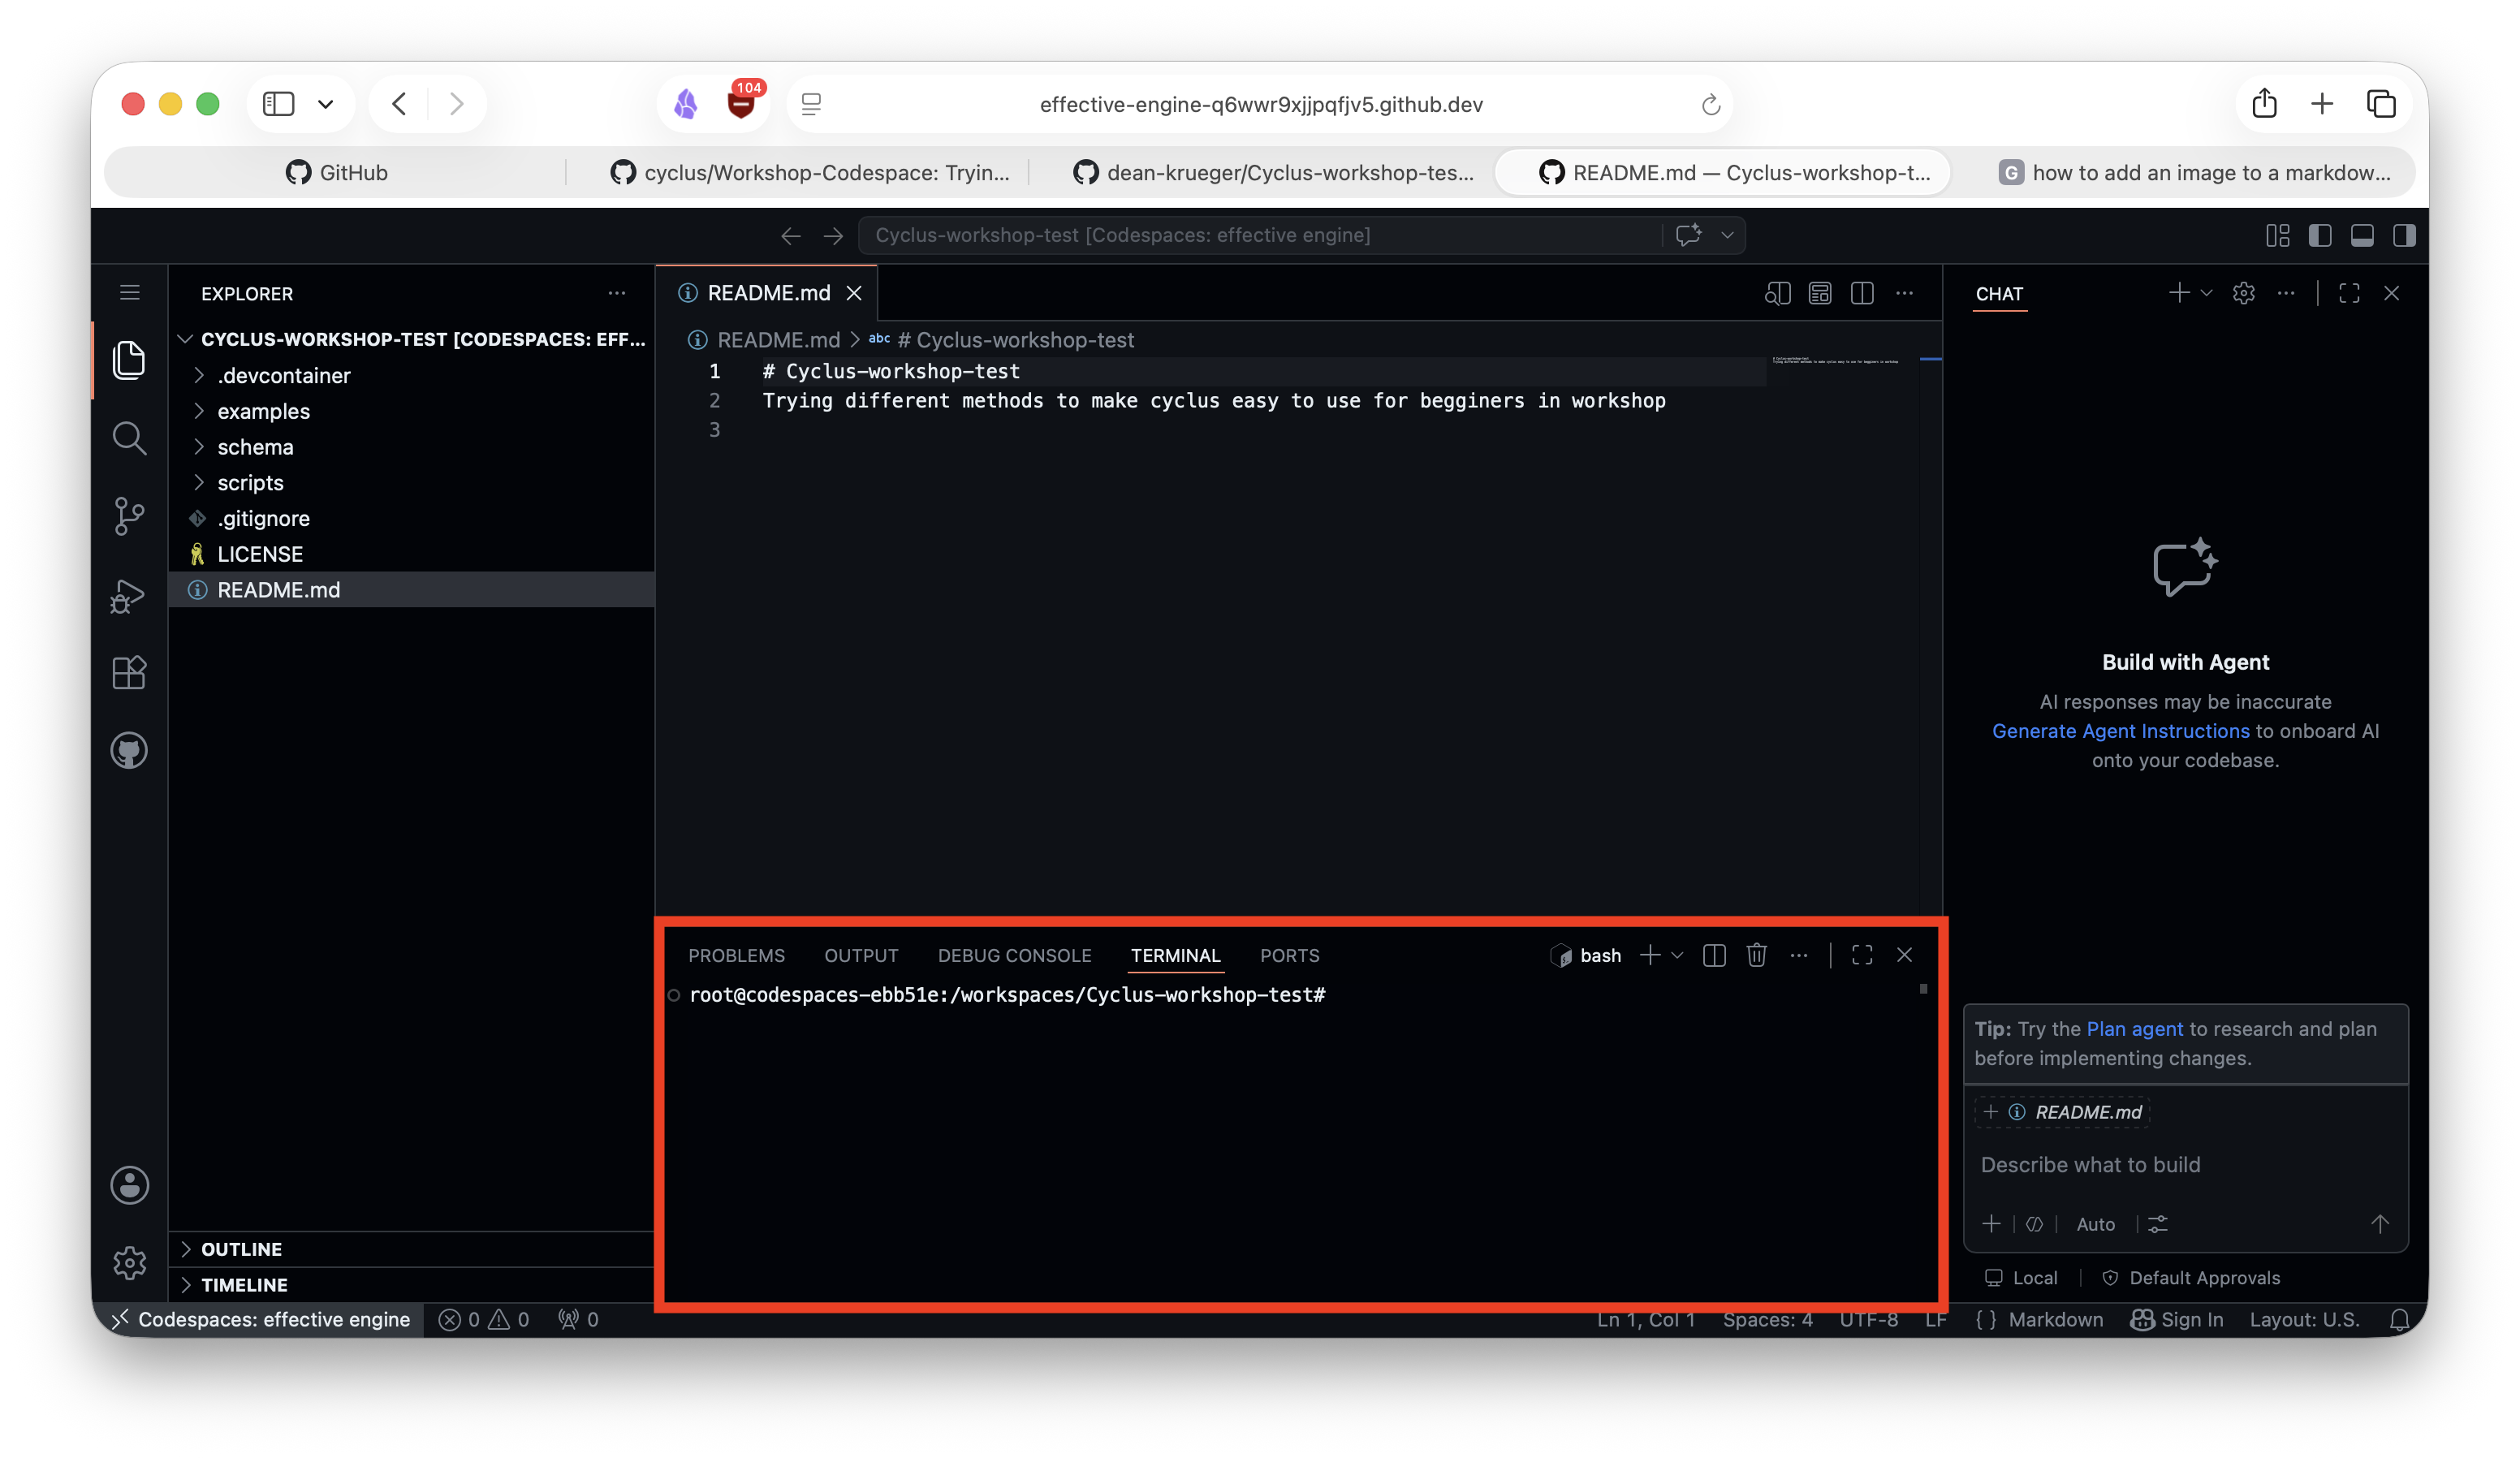
Terminal:
The terminal is where you will be able to interact with the codespace
environment and run Cyclus simulations. This is likely the pane you will
interact with most after the file editor.
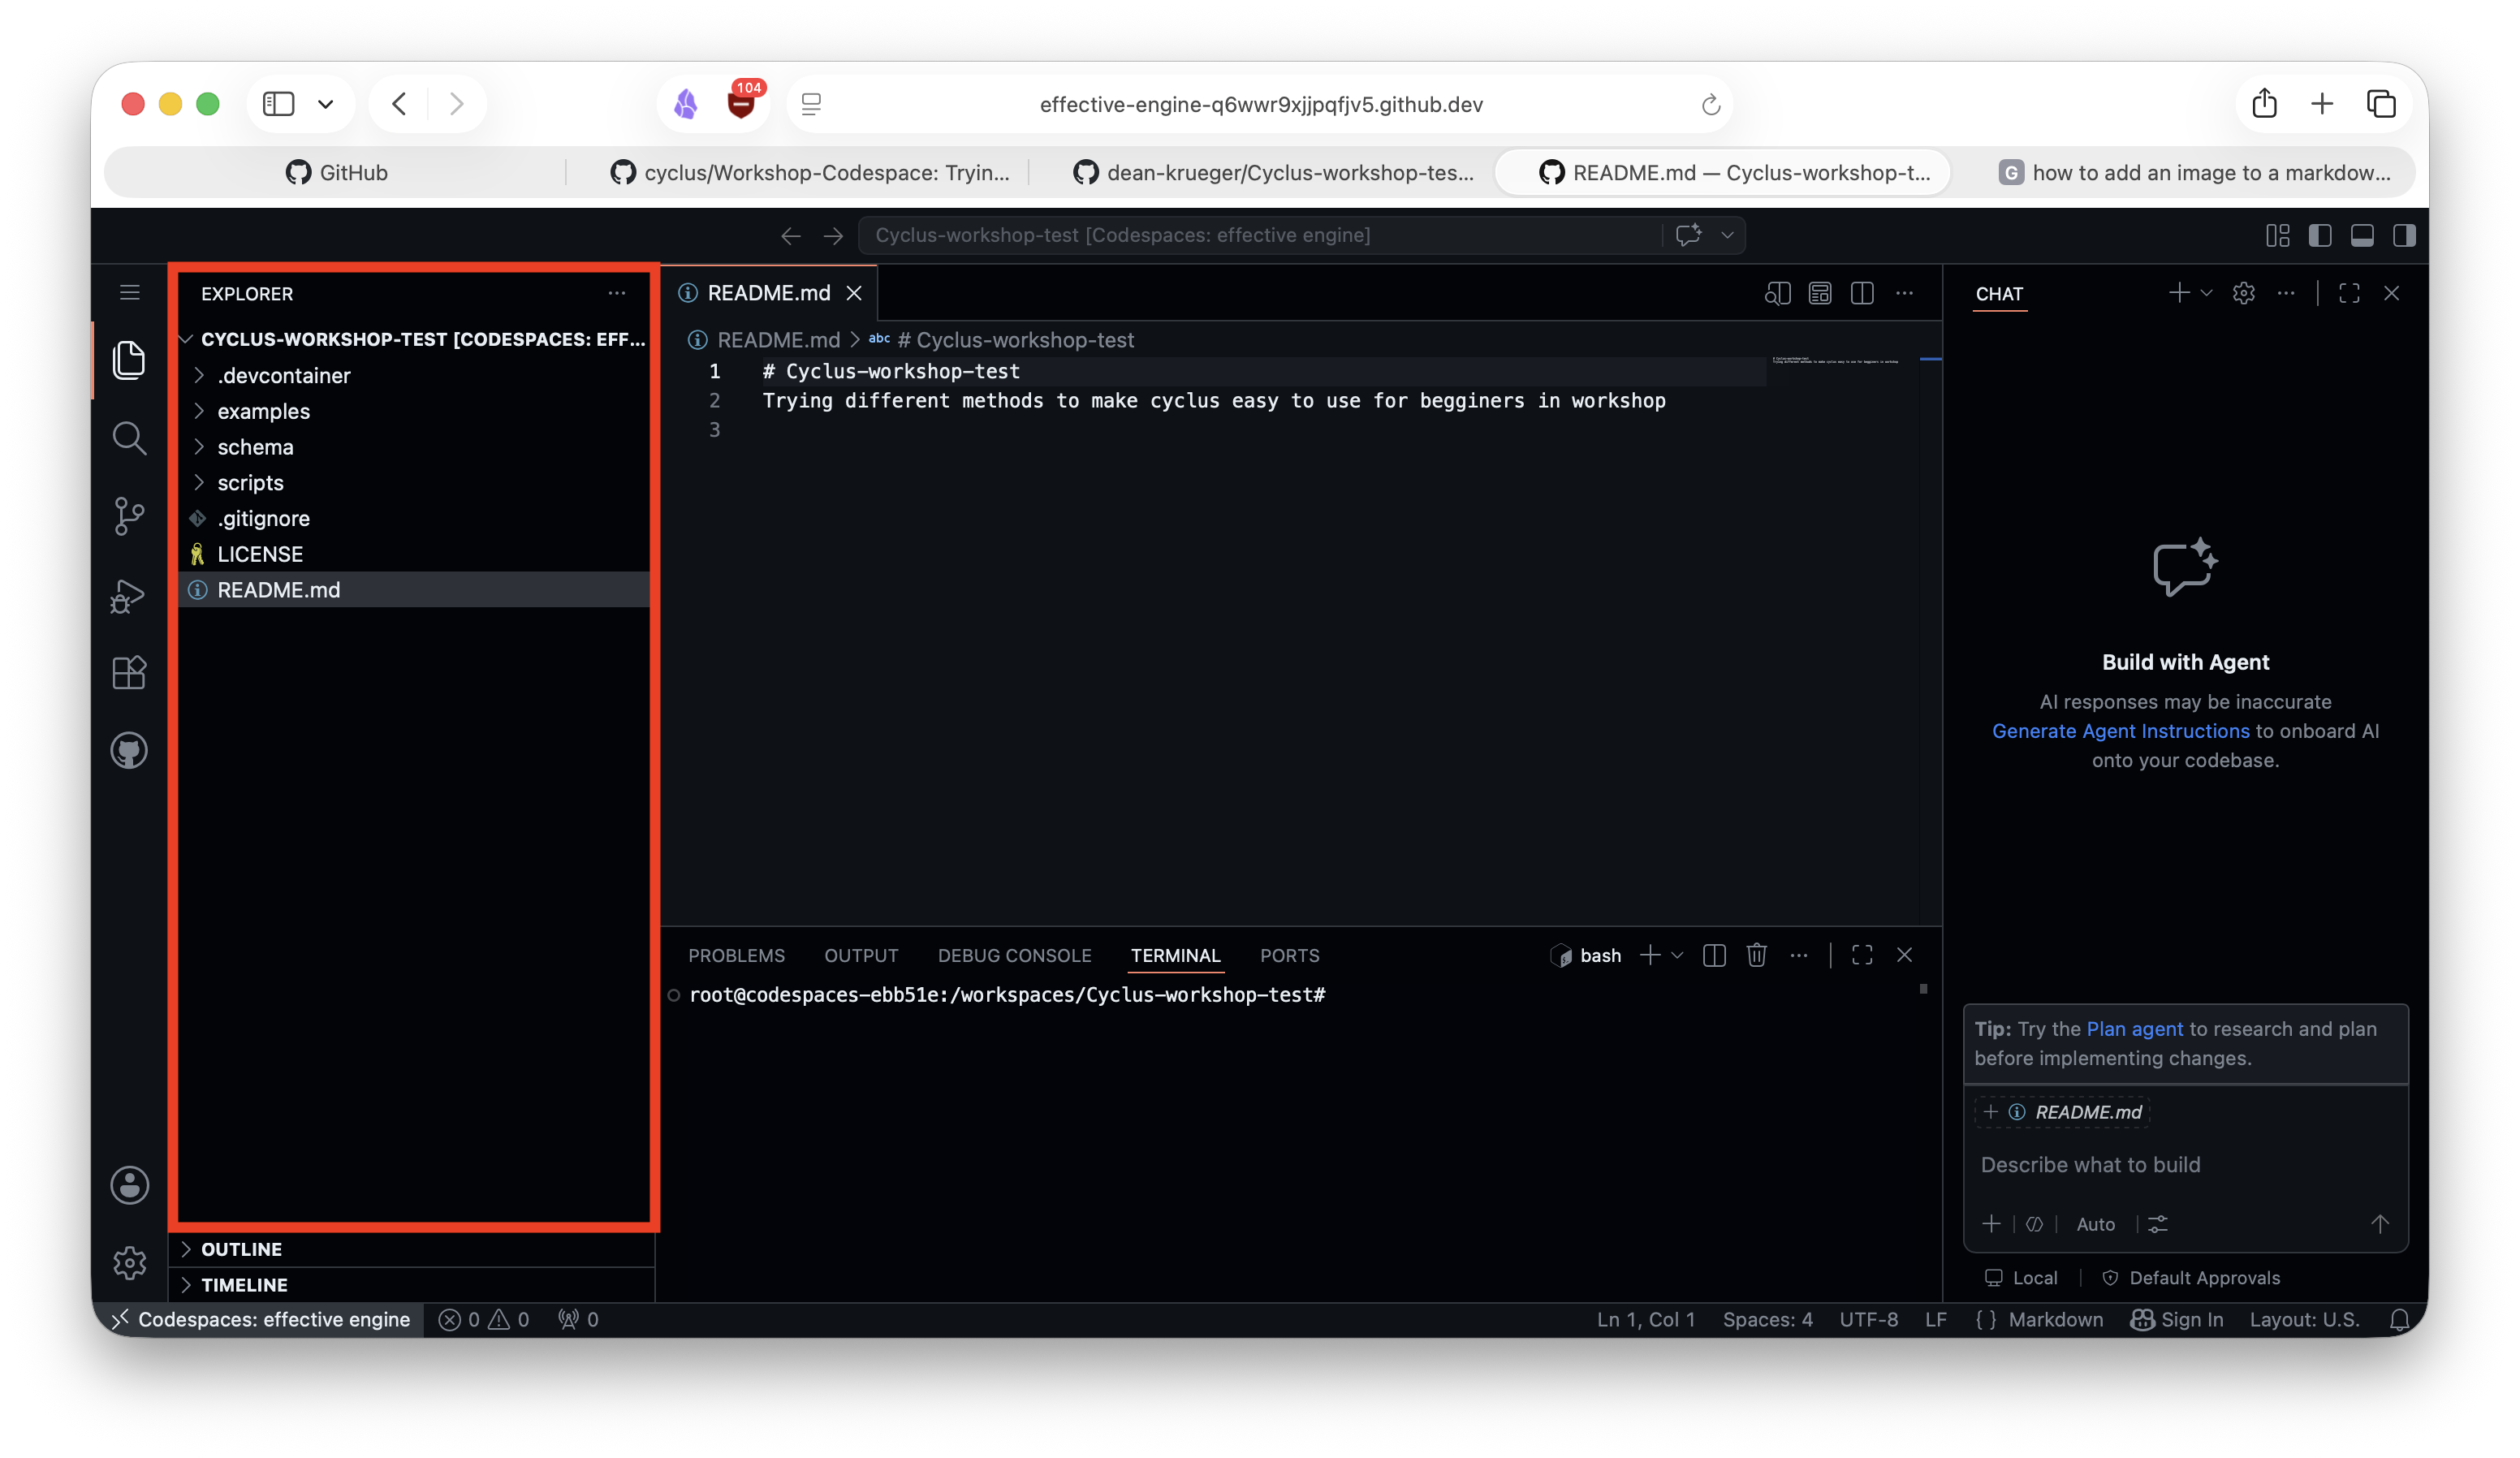
File Explorer:
The file explorer shows all files that are available within the Codespace. From this pane, you are able to navigate the folders in the environment, open, and create new files.
Copilot
This pane is optional, and allows users to interact with GitHub copilot. For the purpose of this tutorial, we recommend you close this pane.
[Step 4] Verify Cyclus Configuration
Finally, verify that Cyclus is installed and that your environment is
configured correctly by running the following commands.
git config user.name
which cyclus
cyclus_unit_tests
Footnotes
-
This Cyclus Workshop can be run from a smartphone, but it is not recommended. ↩